November 3rd, 2010 · 1 Comment
Recently I’ve been a little down about dessert. Wait, don’t panic! I promise this blog hasn’t been hacked or taken over by a savory-only scribe. Let me clarify. I’m by no means turned off from consuming dessert (the horror!). I’ve been turned off from making it.
Every time I’m inspired to bake something special, it’s rare that the end product delivers on its promise. Baking a pie or cake or tart takes more care, time and energy than whipping up a batch of blondies or chocolate covered peanut butter balls, but they never seem to garner as many ohs, ahs, and grabs for seconds.
After bringing a supposed-to-be-delicious-but-in-actuality-ho hum apple cake to a family meal I decided to turn in my baking apron. I was officially over it. With so many store bought goodies to choose from in NYC and guests who are always clamoring to bring something, why put in so much time just to be disappointed with the outcome?
I was feeling pretty confident about my decree, until that is, I stumbled across this recipe for Nutella Cookie Sandwiches. I happened upon it in Cucina Italiana, a gorgeous magazine that usually provides more browsing appeal than actual inspiration.
But these beauties? Well, they had me at Nutella. And then they really had me at Nutella Cookie. By the time I finished reading Nutella Cookie Sandwich I was already tying on my apron.
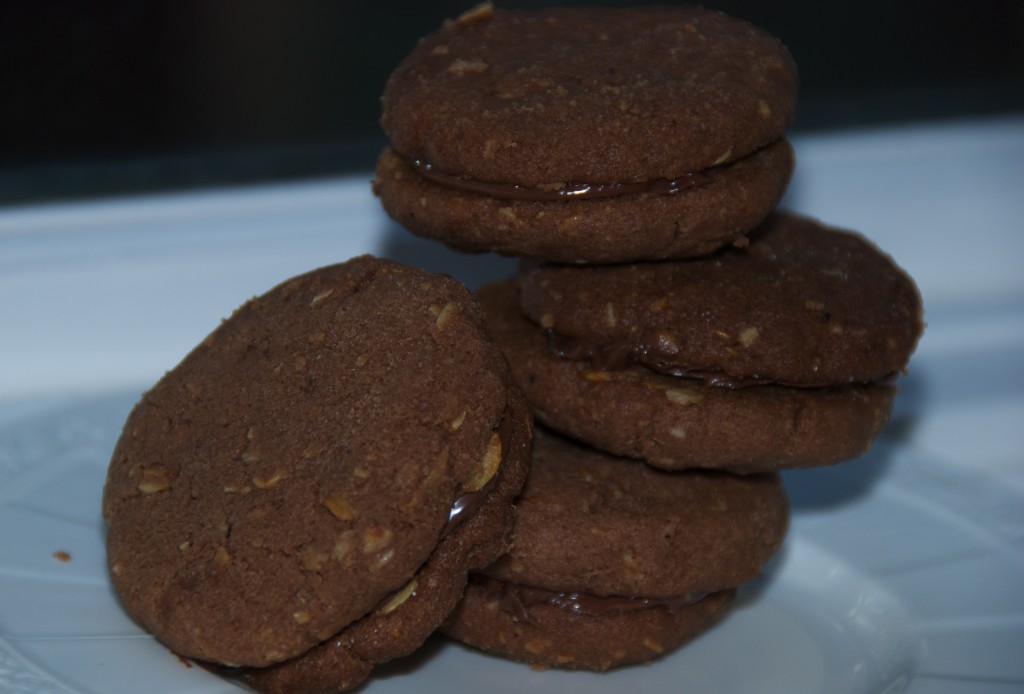
These cookie sandwiches were not short on effort (the rolling into balls and flattening into discs took a lot of time). But they also weren’t short on taste or presentation.
They were crisp but not crumbly. They were salty, sweet, and kissed with the oh-so-fabulously-addictive hazelnutty cream that is Nutella. They were equally as good dunked in milk as they were alongside an espresso martini.
My guests and husband raved. I beamed. And maybe, just maybe, I realized that I’m not quite ready to give up on dessert.
Nutella Cookie Sandwiches
Makes about 30 sandwiches
16 tablespoons (2 sticks) unsalted butter
1 cup oats
3/4 cup Nutella
1/2 cup dark brown sugar
1/2 cup granulated sugar
2 cups unbleached all-purpose flour
2 teaspoons baking soda
2 teaspoons kosher salt
1/4 cup Demerara sugar (I used white granulated)
Filling: 1 cup Nutella
Heat oven to 350. Line 3 baking sheets with parchment paper.
In a saute pan, melt 4 tablespoons butter over medium heat. Add oats and cook, stirring frequently, until fragrant and golden, about 5 minutes. Set aside.
In the bowl of an electric mixer fitted with the whisk attachment, combine rest of butter (at room temperature), Nutella, brown sugar and granulated sugar. Beat on medium speed, frequently scraping down the sides of bowl, until fluffy and well combined, about 4 minutes.
In a separate bowl, whisk together flour, baking soda and salt. In two additions, add flour mixture to butter mixture, mixing on low speed until well incorporated, then add oats and mix until dough comes together and oats are incorporated.
Scoop 1 level tablespoon of dough, roll into ball, then flatten to about 1/8 inch thick. Place on prepared baking sheet. Repeat with remaining dough, pacing cookies at least 1 inch apart. Sprinkle with Demerara sugar or granulated sugar. Bake, rotating pans halfway through until the cookies are puffed and golden, 12-15 minutes. Loosen cookies from parchment or transfer to wire rack to cool.
Once cookies are cool, spread 1 tablespoon Nutella over the flat sides of half the cookies. Sandwich cookie with remaining halves.
Note: Unfilled cookies can be stored up to 3 days, filled cookies up to 2 days.
Neighborhood: Sweets
October 27th, 2010 · Comments Off on Acorn Squash with Chile-Lime Vinaigrette
A few months ago it was hard to imagine life without fresh tomatoes. But as it turns out, I’m pretty resilient.
During my recent trips to the grocery store I’ve been enamored with all things squash. There’s Butternut and Acorn. Spaghetti and Kabocha. They each have a distinct personality but collectively remind you that it’s fall.
Back in the day I would eat squash sprinkled with brown sugar and dressed with maple syrup, but these days I lean towards savory preparations. Squash is already sweet, why not spice it up? That’s the reason this particular recipe caught my eye last season. It’s since become part of my cool month repertoire.
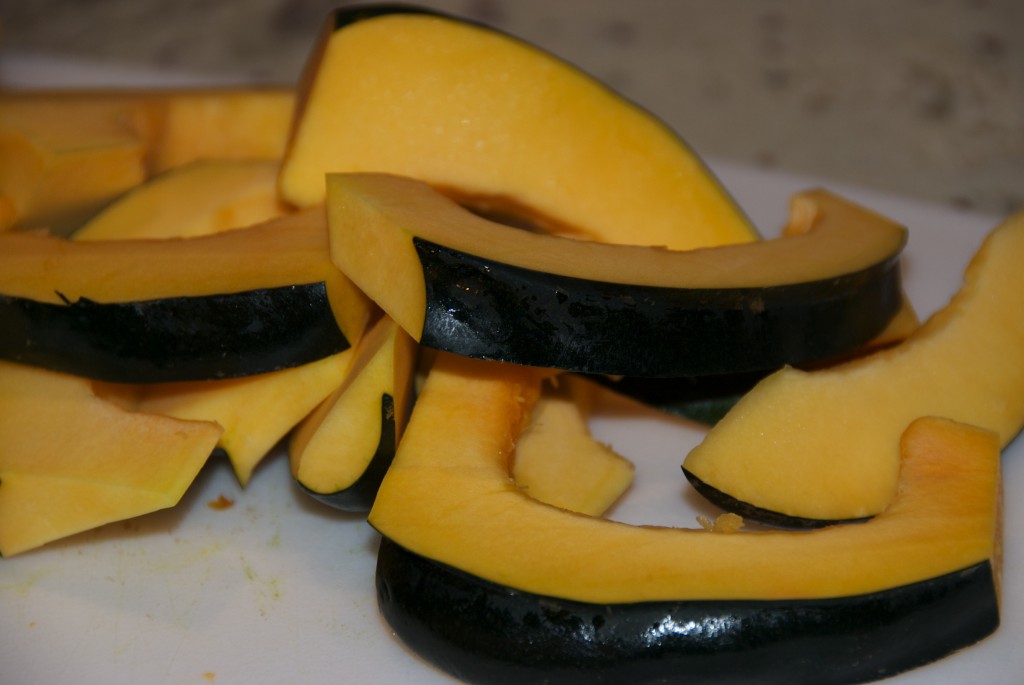
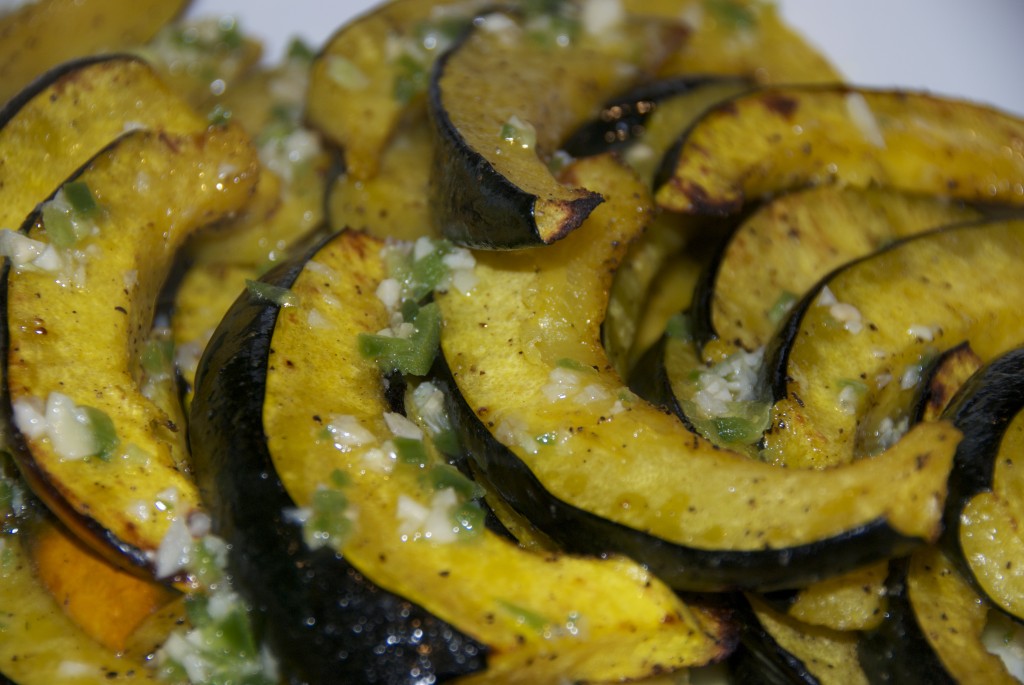
Squash is easy to cook and hard to really screw up. The problem is you have to cut it first. Without the sharpest and biggest of knives you’ll be cursing and sweating (and laughing) as you try to disarm a squash of its seeds and skin. One of the great things about this recipe is the skin is a key element. It holds the squash together during cooking, adds a nice color contrast, and provides some texture.
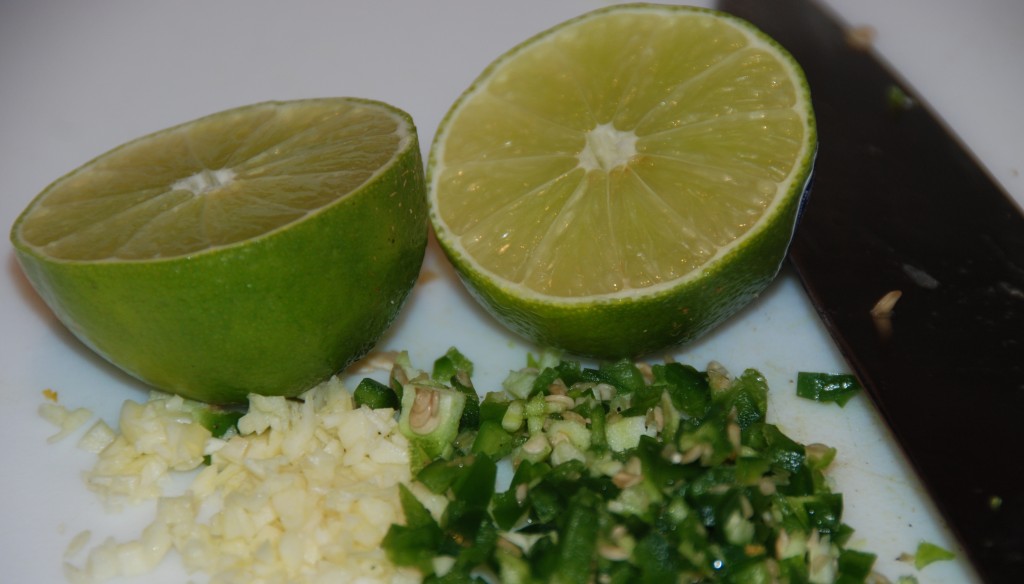
The vinaigrette is tart and a little spicy – the perfect dressing for the sort-of-sweet acorn squash. The dish is super-easy to make, is attractive enough to serve to a crowd, and is just as delicious room temperature (and even cold for your lunch leftovers).
Tomato who?
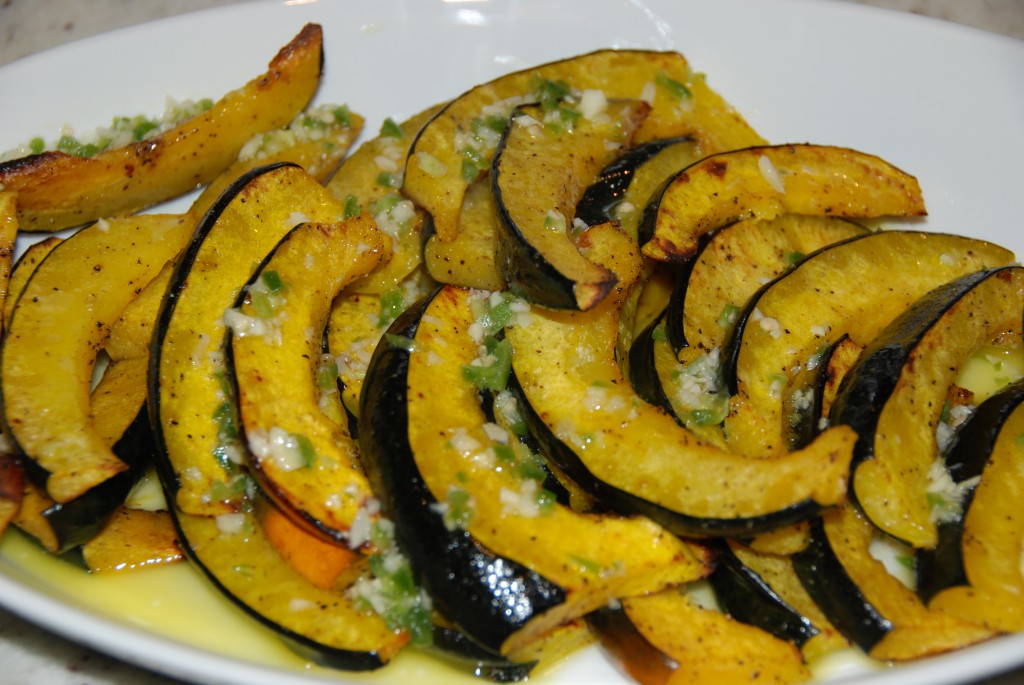
Roasted Acorn Squash with Chile-Lime Vinaigrette
Adapted from Gourmet, October 2006
4 servings
2 acorn squash
1/2 teaspoon black pepper
1 teaspoon salt
6 tablespoons olive oil
2 garlic cloves
2 tablespoons fresh lime juice, or to taste
1 1/2 teaspoons finely chopped fresh jalapeno, including seeds
Put oven racks in upper and lower thirds of oven and preheat oven to 450°F. Halve squash lengthwise, then cut off and discard stem ends. Scoop out seeds and cut squash lengthwise into 3/4-inch-wide wedges. Toss squash with black pepper, 3/4 teaspoon salt, and 2 tablespoons oil in a bowl, then arrange, cut sides down, in 2 large shallow baking pans (sometimes I can squeeze them on one). Roast squash, switching position of pans halfway through roasting, until squash is tender and undersides of wedges are golden brown, 20 to 30 minutes.
While squash roasts, mince garlic and mash to a paste with remaining 1/4 teaspoon salt. Transfer paste to a small bowl and whisk in lime juice, jalapeno and remaining 1/4 cup oil until combined. Transfer squash, browned sides up, to a platter and drizzle with vinaigrette.
Neighborhood: Veggie Sides
October 19th, 2010 · Comments Off on Lincoln
A year of planning. A $20-million renovation. A resume that boasts your time under Thomas Keller as Per Se’s chef de cuisine. There’s enough pressure and expectation to make Jonathan Benno leave the kitchen at Lincoln and run away with the Big Apple Circus.
Lincoln Center has much to offer – opera, theater, concerts, a showpiece fountain, and yes, the circus. This eclectic mix draws an equally eclectic swath of visitors – highfalutin Manhattanites, culture-seeking tourists, and those who just come to take in the scene. It’s difficult to be everything to everyone, and at Lincoln – Lincoln Center’s newest attraction – this tough position results in a few disconnects.
There aren’t tablecloths and there isn’t an antipasti under $20.
There are walk-ins wearing sneakers and jeans and diners with reservations decked in diamonds and heels. (Did I mention the meal will cost about $150 a person?)
There are those rushing through to make a show and others settling in for a night in which the meal IS the entertainment.
The space is spectacular. There’s a sloping lawn roof, a glassed-in kitchen, walls of windows, and leather swivel chairs.
The service is professional and charming. Though our team of servers appeared to be working out some kinks, they kept their issues to themselves. Benno has duplicated the all-accommodating, all-friendly, and nothing-pretentious-here service that I love at Per Se, but that’s where the parallels stop.
Benno abandons Keller’s French for upscale Italian, a focus that has people drawing lines to Michael White (poor Benno, can’t he just be Benno?). I disagree. White succeeds at innovation and the combination of unique flavors. Benno shines most when he’s keeping things simple and rustic.
The potato gnocchi were swoonworthy. The melt-in-your-mouth morsels tasted solely of spud and butter. The terrine of foie gras, rabbit and sweetbread was a taste trifecta. The honeycomb tripe should have Batali asking for the recipe. The burrata was as good as I’ve had, though the pairing with sweet and soft squash did nothing to accentuate the cheese’s creamy texture. A side of mixed mushrooms burst with earthiness. For dessert, a huckleberry tart was as delicious a it was humble. It left the chocolate budino looking too prim and proper.
Benno also excels at pasta. The silky green lasagna, served as a circle so pristine you’re almost remiss to touch it, features a hearty veal, beef, and pork ragu that miraculously doesn’t overpower the delicate pasta and cheese.
Excitement diminished at the arrival of our entrees. The veal chop should have been more tender. The 28-Day Dry-Aged Sirloin was good but not memorable. Both suffered from a liberal application of salt. The same heavy hand also affected a side of eggplant and a scallop antipasti – neither of which our table finished.
The bread and petit fours were plentiful but lackluster. Reminding you, both at start and finish, that Lincoln is not Per Se. Benno could easily and quickly solve these problems in an arrangement with that guy who owns Bouchon Bakery, but I have a feeling he’d prefer to figure it out on his own.
Neighborhood: Upper West Side
October 14th, 2010 · 2 Comments

It’s hard not to be overcome with giddiness when you step into Little Cupcake Bakeshop, the newest sweet outpost to land in NoLIta. There’s enough frosting to paint an entire tenement building. Twice. There’s enough sugar to give the whole neighborhood a glucose contact high. The floor is checked in black and white. The cozy tables are marble-topped.
Despite having to schlep from the original Bakeshop in Brooklyn, the staff seemed genuinely happy to be there (perhaps a move to Manhattan is what all Brooklynites secretly dream about?). They oozed such helpfulness and friendliness one might wonder if half their pay is in baked goods.
Before I’d even tasted a single thing I was already plotting: When was the next birthday celebration to which I could bring cupcakes? When could I order a pie for Thanksgiving? Would I ever have to bake again? Expectations were high.
Little Cupcake Bakeshop has sixteen varieties of cupcakes, fourteen three-layer cakes, and a handful of pies, bundt cakes, cheesecakes, and cookies. They also have brownies, bars, puddings, and breakfast muffins and bakeries. It was like my very own version of Willy Wonka and the Chocolate Factory.

I chose my (and my hubby’s) favorite cupcake flavor – Golden Vanilla with chocolate frosting and then added a Peanut Butter cupcake and a Rocky Road bar for good measure.
Despite their ascension up the trendy ladder, so many cupcakes fail to wow. This city is a glaring example of cupcake mediocrity: Magnolia, Crumbs, and the Cupcake Cafe to name a few. A cupcake is only as good as its frosting and often frosting is either too sweet or not sweet enough. Sometimes it isn’t creamy. Sometimes the cupcake-to-frosting ratio is off. There are no such missteps at the Bakeshop.
The frosting is ridiculous. Ridiculously good, ridiculously creamy, and ridiculously slathered on. These little cuties aside, it’s some of the better frosting I’ve had in this city. The cupcake itself is the ideal size and is just moist and flavorful enough to carry its decadent topping.

The Rocky Road bar hit yet another high note. It’s sunken in the middle, letting you know that it was pulled from the oven at that all important time to ensure optimal gooeyness. The marshmallows – often annoyingly sparse in treats bearing the Rocky Road name – were in full effect, pervading every bite. It tasted of home cooked, unprocessed deliciousness.
My husband confidently declared that these were the best treats I’d brought home in a long time. (If you’re a faithful reader of this site, you know I bring home a lot of treats.) I couldn’t agree with him more.
Who’s up for a birthday party?
The Little Cupcake Bakeshop is located at 30 Prince Street (at Mott).
212.941.9100
Neighborhood: NoLIta
October 6th, 2010 · Comments Off on Bomboloni
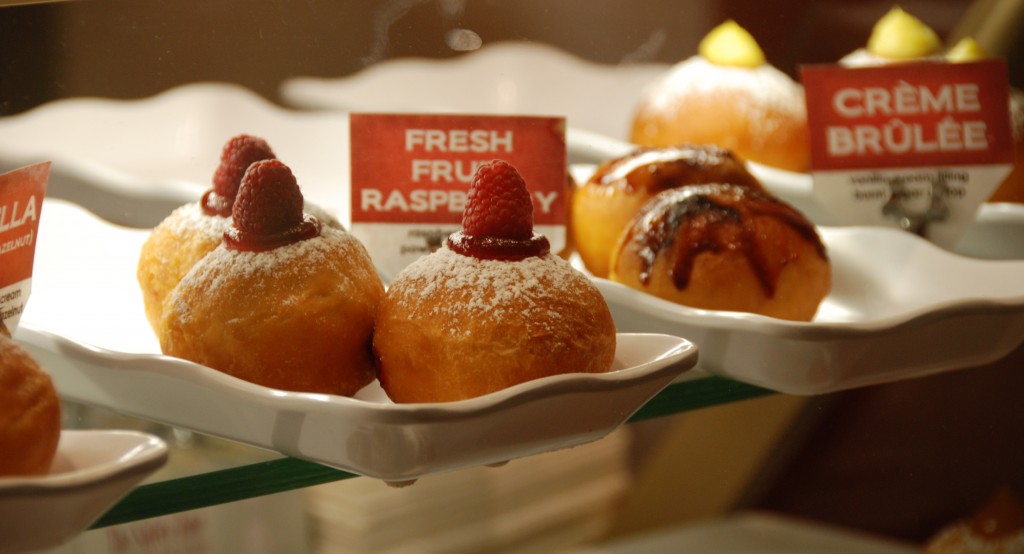
Bomboloni, an Italian cafe on the Upper West Side, is named for the filled pastries that take up most of the real estate in the cafe’s cheery confines. As for the pastry’s moniker, it’s derived from the Italian word bombaloni. Translation: “little bombs.”
Though bomboloni are the specialty, Bomboloni also has gelato, paninis, and coffee drinks. I drank one of the best cups of decaf coffee I can remember this side of the Atlantic.
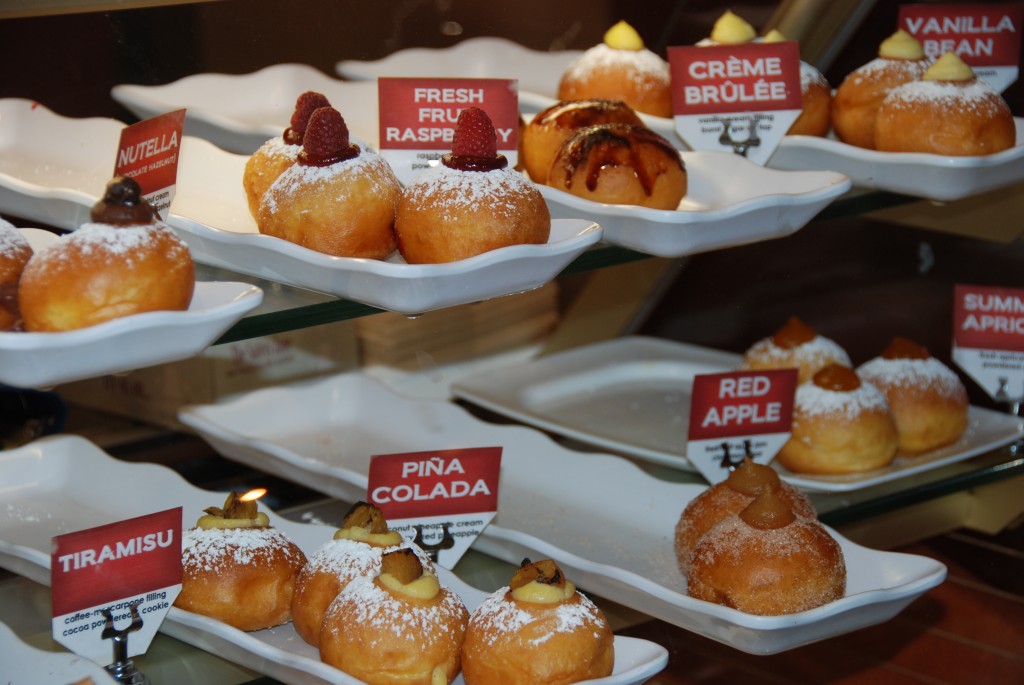
The cafe offers over a dozen types of bomboloni. They range from the classic (raspberry, strawberry, pistachio, vanilla bean, and chocolate) to the more modern (peanut butter cup, s’mores, creme brulee). The majority of the flavors are available in the regular size (think tennis ball) while a few also come in a smaller size (think golf ball). The regular bomboloni are $1.50 each or 6 for $7.
While bomboloni are technically pastries, their taste and consistency cause an unavoidable comparison to doughnuts. A comparison that doesn’t necessarily bode well for the bomboloni.
I’m a sucker for a warm doughnut. Actually, I’m a sucker for any type of dough that emerges from a fryer. I love the smell. I love the consistency. I love the glorious glaze it leaves on my fingertips.
At Bomboloni the pastries are served room temperature, something that I knew would immediately put them at odds with my temperature sensitive taste buds. But who turns down something as adorable sounding and looking as bomboloni? Maybe, just maybe, these little bombs would blow me away.
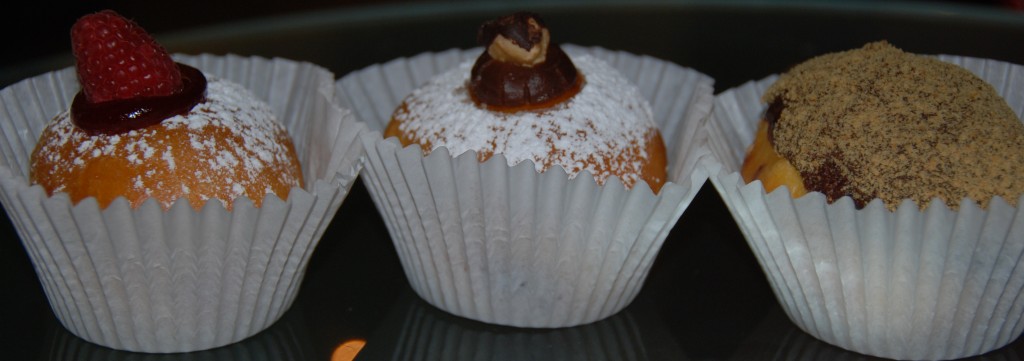
After much rumination, we choose raspberry, nutella, s’mores, chocolate and vanilla bean. The dough had all the right characteristics. It was dense without being heavy. Soft but slightly chewy. Buttery but not greasy.
The raspberry was by far the best. An elevated version of the go-to jelly doughnut.
The bomboloni with exotic fillings fizzled rather than exploded. The s’mores filling tasted more like Boston cream than marshmallow. The nutella was a dumbed-down version of the decadent stuff, devoid of any hazelnut flavor. Even the vanilla bean, though flecked with genuine bean, tasted like cream cheese.
With Magnolia Bakery just a block away from Bomboloni its hard to imagine choosing the filled pastries over my beloved banana pudding. In my war of desserts, the pudding is the bomb. No translation needed.
Neighborhood: Upper West Side
September 28th, 2010 · 1 Comment

I’m a New York City food snob. A Manhattan-restophile. I get frustrated by Time Out NY’s distracted coverage of that other borough. I’m annoyed that Sam Sifton spends too much time on the wrong side of the water.
I know there are Brooklyn restaurants that deserve praise. I’m willing to concede that there is likely some amazing food over there. I just don’t see how it could be better than here. Why it would merit a subway ride away from the heart of New York, the city’s pounding pulse drowned out by the East River.
A good friend, keenly aware of my Brooklyn-phobia, has been pushing me to face my fears. A few weeks ago the push turned intervention. On a Wednesday he emailed, “I got us a reservation at Brooklyn Fare this Friday. Only 18 seats – chef’s table!” I began to type my reply, “Must be a real hot spot if you could get us in so easily.” I stared at the screen and then hung my head in shame. I held down the Delete key and tried to erase the person I had become. I needed help.
As it turns out, Cesar Ramirez’s 9-course tasting menu at the Chef’s Table at Brooklyn Fare is a suitable treatment plan. Amuse bouches included, the program is about 14 steps.
An amuse bouche parade kicks off the meal. There was a sardine delicately strapped onto a potato chip. A luscious bite of toro tartare. A gussied kumomoto oyster. In separate instances, the delicateness of blowfish and peeky-toe crab was muddied by an unnecessary battering and frying.
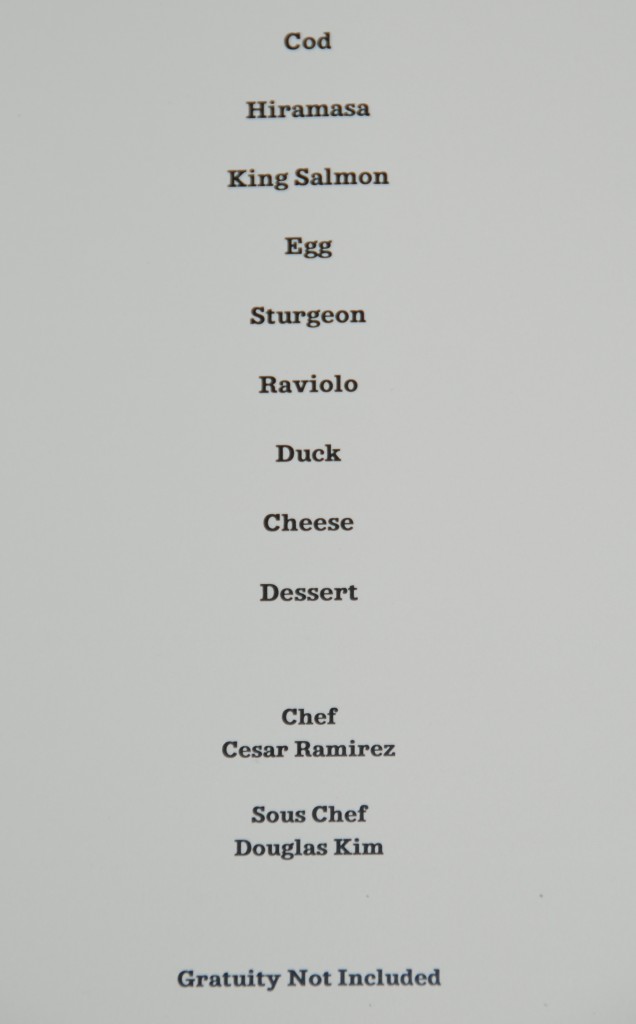
The menu reads simple. The food is complex. Four-bite constructions boast elegance, flavor, skill, and restraint. Though his stints at Bouley and Bar Blanc might throw you off the scent, Ramirez leans towards Japanese-style cooking. At Brooklyn Fare his often changing menu focuses on clean flavors and fresh ingredients. Everything is balanced. At David Chang’s Momofuku Ko the tastes and textures slap you in the face. At Brooklyn Fare they caress your cheek.
Every fish course glistened. A poached egg was submerged in meaty broth. A pillow of veal raviolo would have made Batali swoon. The meal hit status quo at the seventh course with a piece of ho-hum duck. The cheese course was a serviceable palate cleanser. The dessert was forgettable and there wasn’t a single petit four or truffle. It was as though the parade lost steam and then decided to abruptly call it quits.
The setting is intimate-meets-industrial. Though the small space is attached to, and affiliated with, the Brooklyn Fare grocery, it appears stand alone. The kitchen is open, but there’s not much to see. Chef Ramirez and his lieutenants hardly break a sweat over a too-clean stove top. There’s more plating than cooking.
Ramirez is a chameleon of a host and chef – his colors change on the whim of his diners. He stayed camouflaged until we coaxed him out. It was only then that he spoke a little louder when describing the dishes, chatted about the restaurant, and happily drank wine offered by his patrons.
For now, Brooklyn Fare is a BYOB establishment. A skinny bar top features an ice bin and a selection of wine glasses to hold whatever bubbly, red, white, or apertif you bring along. The BYOB set-up is one of the restaurant’s biggest coup’s and you’ll be wise to take advantage of it before Ramirez fills his cellar and deploys a $95 wine tasting (which as I understand it, is happening soon).
At $135 per person, Brooklyn Fare doesn’t offer the best of value, but it does suggest a reason to go to Brooklyn. Chef Ramirez is cooking up some some wonderful things. It should come as no surprise he honed his skills in Manhattan.
Neighborhood: Brooklyn
September 24th, 2010 · 1 Comment
Feast your eyes dear eater-friends, CleanedMyPlate has been polished and shined! I’m thrilled with the new site navigation and based on the requests I’ve been getting over the past few months, I have a feeling you will be too.
Along with the redesign process came two reconfirmations. First, I’m insanely fortunate to have a husband who is not only a master of all things grilled, but also a master of all things technological. This site would not be what it is without his help. Second, it’s insanely difficult to succeed in the restaurant business. This was verified when I added a (closed) designation to all restaurants that had shuttered since I posted a review. There were many.
So how do we thank a tech-savvy hubby and celebrate a NYC restaurateur who is trying to succeed in NYC’s food landscape? We patronize Francois Payard’s new Greenwich Village bakery, FPB, to pick up “thank you” sweets!
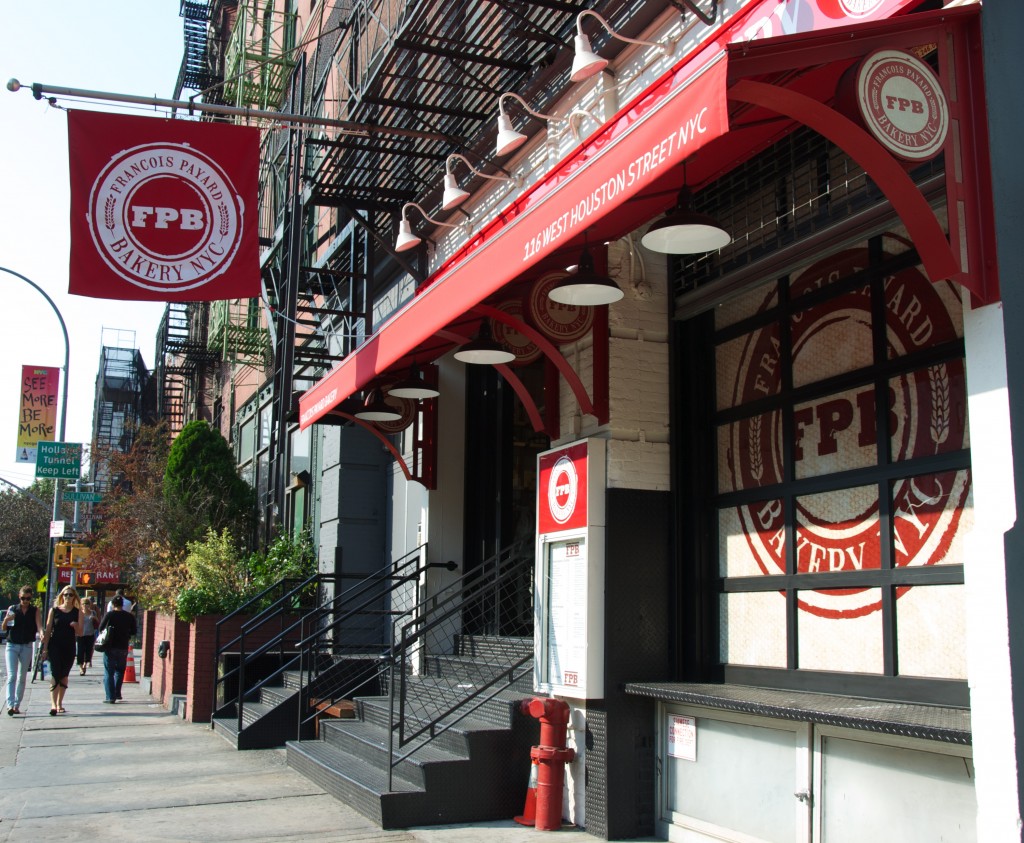
Payard used to have a restaurant and extensive bakery/cafe on the Upper East Side. Last year it was forced to close due to a variety of woes. In this instance us Downtowners are more than willing to take the UES’s sloppy seconds, which in the case of Payard and baked goods, are very far from sloppy.
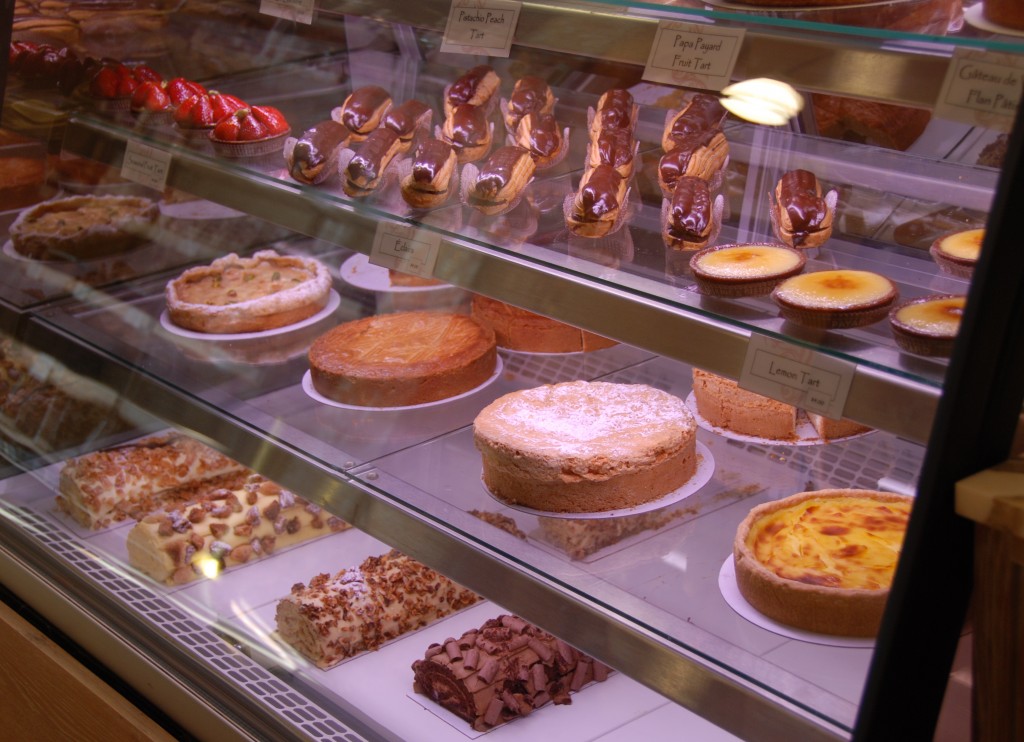
Payard’s bakery on the Upper East Side was overstuffed with pastries and truffles galore. There were way too many doilies. At FPB, Payard seems to have read the neighborhood just right. There’s a refreshing simplicity – both in the atmosphere and the pastry cases – that’s well suited to the no-frills sidewalks of Houston Street. It’s less patisserie, more bakery.
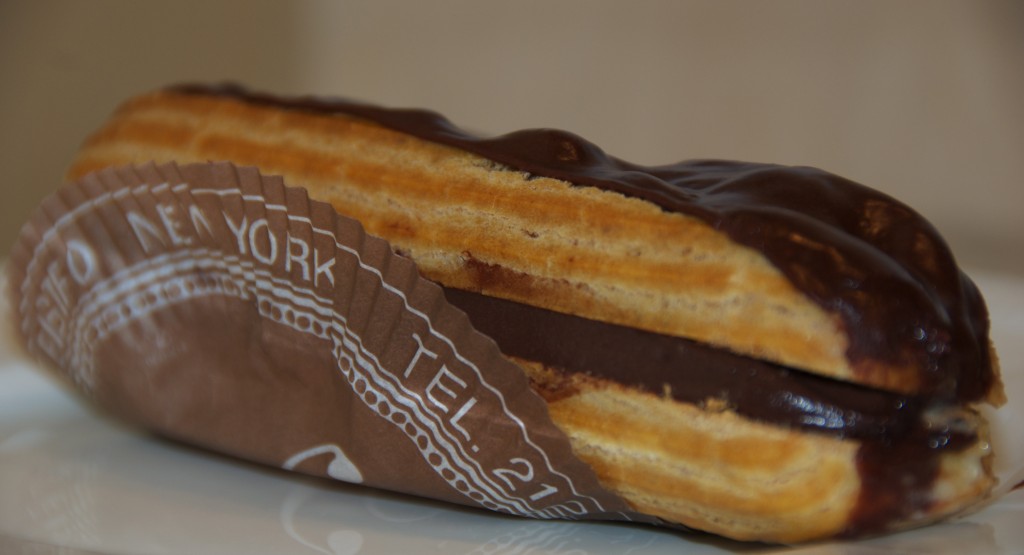
Though I prefer vanilla-filled eclairs, when the friendly woman behind the counter told me that these chocolate-filled ones had just come out of the bakery (yes, it’s right there at the back of the store), I couldn’t resist. The chocolate mousse filling wasn’t overpowering and played nicely with the slightly sugary icing. Overall a good eclair, but not an amazing one.
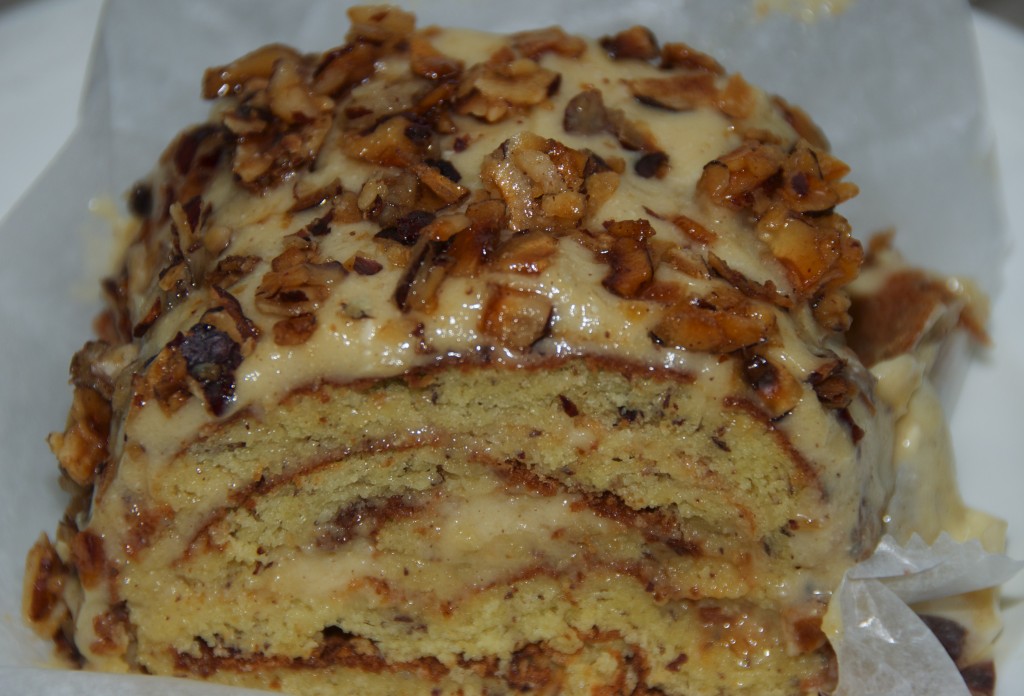
Payard has a beautiful line-up of rolled cakes: chocolate, chocolate-raspberry, orange blossom, vanilla, and hazelnut. The hazelnut cake was uber-moist and not too sweet. It had a good textural contrast going between the toasted nuts, the soft cake, and the creamy icing. It tasted as though it was baked with wonderful ingredients and a lot of love.
Welcome to the ‘hood, Francois!
Neighborhood: SoHo · West Village
September 15th, 2010 · Comments Off on Romesco Potatoes
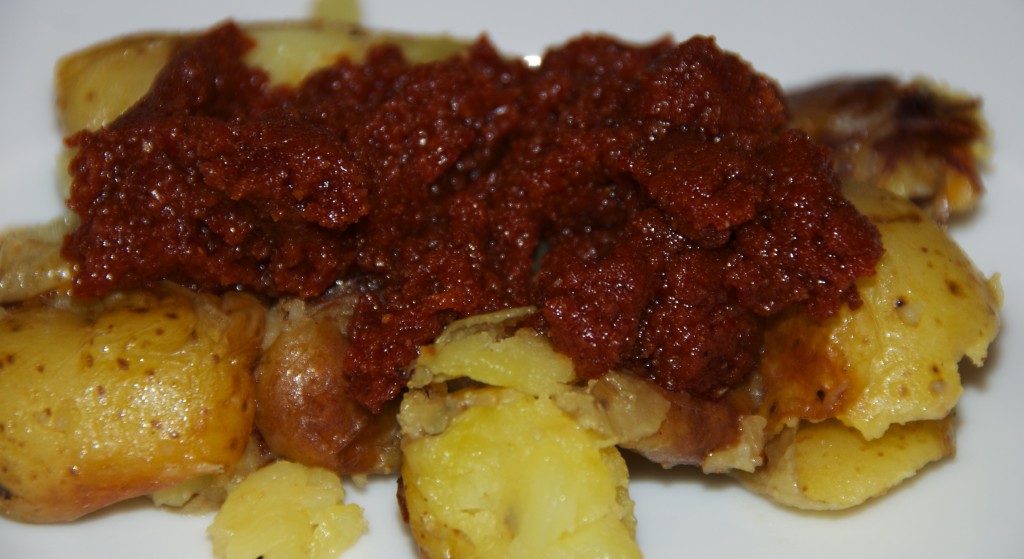
In Suzanne Goin’s Romesco sauce, a seemingly bizarre combination of ingredients – including almonds, hazelnuts, toasted bread, ancho chile peppers – are pureed into a sublime pesto-like sauce. When your guests start to swoon over the texture and richness, introduce one of my favorite dinner games: Guess the ingredients! You can even offer a prize of extra romesco sauce – don’t worry, they’ll never win.
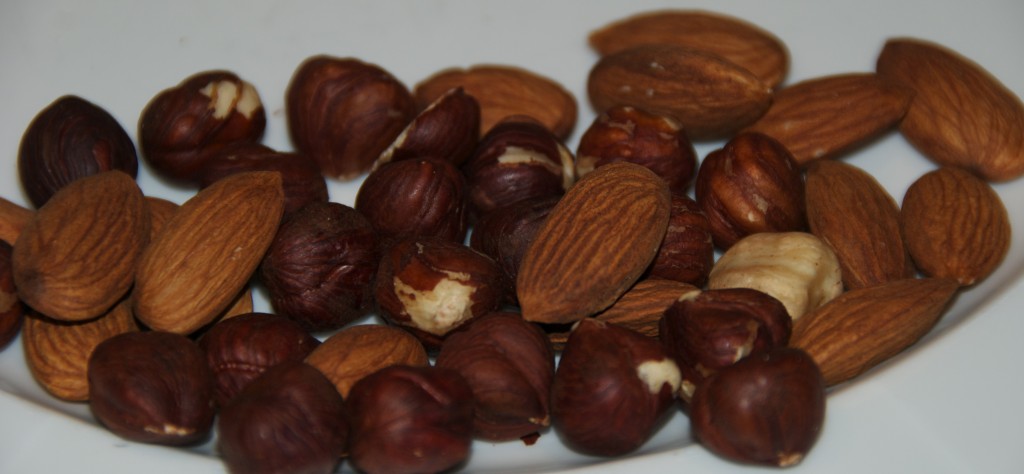
No one will be able to name anything other than the tomato, olive oil, parsley, and garlic. The idea that nuts, bread, and peppers could create something so wondrous is pretty much unimaginable. After you’ve floored them with the surprise ingredients, tell your guests that from the moment you read the recipe, you just knew it would be something special. They’re sure to talk about you in hushed whispers on the way home. In the way all home chefs dream about.
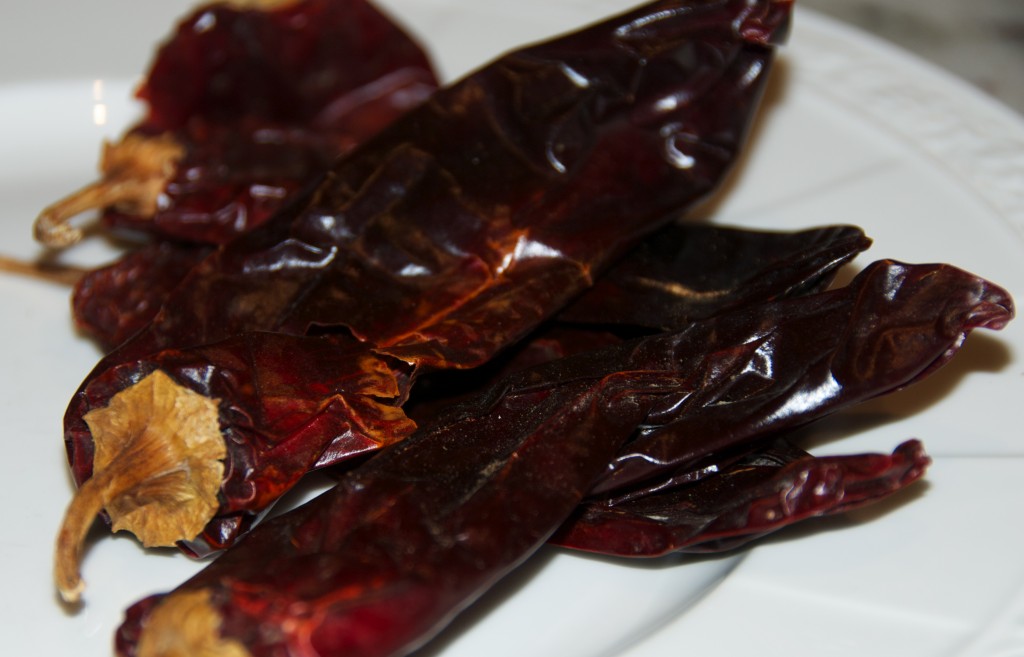
Another reason to love this romesco sauce is that it delivers an insane amount of flavor without any spice (the chiles are milder than mild). It’s perfect for guests – like my parents, for example – who don’t like the kick of red pepper flake or the heat of cayenne. On the flip side, anyone who favors spicy food will be blown away that a dish can achieve such intense taste without a single spice (there isn’t even any pepper!).
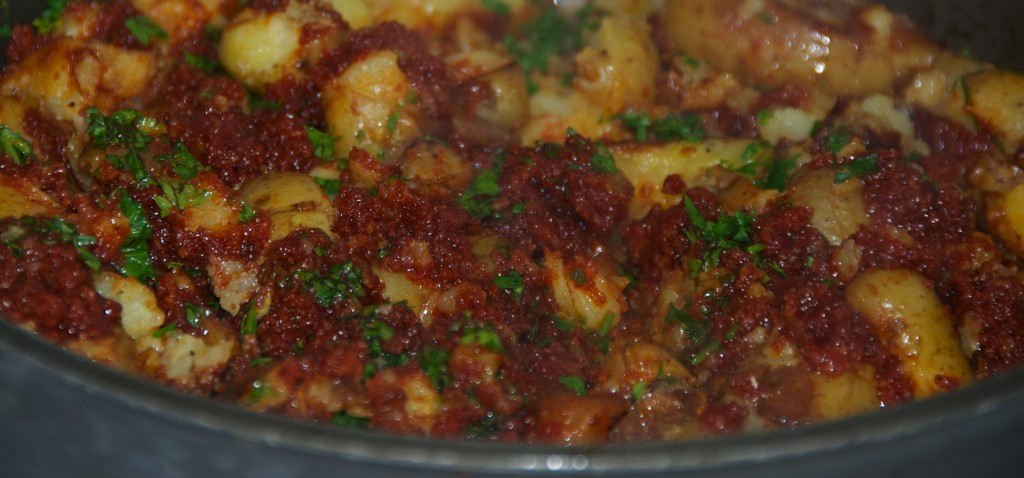
These romesco potatoes will make everyone happy. They were perfect with lamb, but a bit too much with steak. I think they’d be wonderful with roasted chicken and maybe even a dense fish like swordfish.
In the last ten years I’ve bought approximately one cookbook for myself. These days, a Google search can find almost any recipe, from any chef or magazine. Cook-friendly websites like Epicurious and AllRecipes operate like the iTunes of the recipe world, allowing us to obtain recipes piecemeal, instead of having to invest in a whole
So what made me buy Suzanne Goin’s Sunday Suppers at Lucques? This guy wooed me with Goin’s Deviled Chicken Thighs and Roasted Pork Loin with Haricot Verts and Mustard Bread Crumbs. It sounded like a cookbook worth owning.
Goin’s recipes involve many steps and ingredients. It’s easy to open her beautiful book, get overwhelmed by the seemingly difficult recipes, and return it to the shelf for another day. But here’s the secret: Goin’s recipes are more time-consuming than they are complicated. If you read her recipes carefully and and are comfortable (occasionally) overriding her explicit instructions and detailed steps in favor of your inner chef’s instincts, you’ll be just fine. The payoff is that executing any of Goin’s dishes will make you feel like a true chef.
This romesco is like no red sauce you’ve ever had before. So go on, be a chef.
Romesco Sauce
Adapted from Suzanne Goin’s Sunday Suppers at Lucques
5 ancho chiles
2 tablespoons raw almonds
2 tablespoons blanched hazelnuts (I rubbed off their skins after they were toasted and cooled)
1 cup extra-virgin olive oil
1 slice bread, about 1-inch thick (I’ve used both sourdough and semolina to great results)
1/3 cup canned, pureed tomatoes
1 clove garlic, chopped
1 tablespoon chopped flat-leaf parsley
lemon, for juicing
A splash of wine vinegar
Kosher salt
Note: This sauce can be made up to two weeks in advance and stored in the fridge.
Potatoes
2 pounds mini Yukon Gold potatoes
3 TBSP extra virgin olive oil
4 to 5 cloves garlic, unpeeled
Romesco sauce from above
2 tablespoons chopped flat-leaf parsley
Kosher salt and freshly ground black pepper
Sauce: Preheat the oven to 375°F. Remove and discard the seeds and stems from the chiles, then soak them in warm water for 15 minutes to soften. Strain the chiles, and pat dry with paper towels. Meanwhile, spread the nuts on a baking sheet and toast for 8 to 10 minutes, until they smell nutty and are golden brown.
Heat a large sauté pan over high heat for 2 minutes. Add 2 tablespoon olive oil, wait a moment (for it to heat) and fry the slice of bread on both sides until golden brown. Remove the bread from the pan and cool. Cut it into 1-inch cubes and set aside.
Return the pan to the stove over high heat. Add 2 tablespoon olive oil and the chiles and sauté for a minute or two. Add the tomatoes. Season with 1/2 teaspoon salt and cook for 2 to 3 minutes, stirring often until the tomato juices have evaporated. Turn off the heat and leave the mixture in the pan.
In a food processor, pulse together the toasted nuts, garlic and fried bread until the bread and nuts are coarsely ground. Add the chile-tomato mixture and process for a minute or two more. With the machine running, slowly pour in the remaining 3/4 cup of olive oil and process until you have a smooth purée. It’s normal for the romesco to “break” (separate into solids and oil). Add the parsley, season to taste with lemon juice, vinegar and salt.
Potatoes: On recommendation from this fine cook, I used a 12-inch cast iron skillet for all the below steps. Place the potatoes in skillet and toss well with 2 tablespoons olive oil and a heaping teaspoon of salt. Cover tightly with aluminum foil and roast the potatoes until tender when pierced (30-45 minutes).
Transfer cast iron skillet to stove-top and heat on high for 2 minutes. Pour in the remaining 1 tablespoon oil, turn the heat to medium-high and wait 1 minute more. Smash the potatoes with a fork until they’re very broken up (think hash browns). Season with salt and pepper and sauté for 6 to 8 minutes until they are crispy on one side. After they’ve browned nicely on the first side, turn them until they color on all sides (the crispier the better). Spoon the romesco sauce over the potatoes and stir. The romesco will dry out a bit as you cook it. Toss in the parsley. Adjust seasoning if necessary.
Neighborhood: Starchy Sides
September 7th, 2010 · Comments Off on Carrot Salad with Harissa, Feta and Mint
My friend and I have a running joke about the traditional carrot salad her mother-in-law often prepares for family gatherings. You know the one – its got raisins, apples, honey, maybe chunks of pineapple, and some mayo. For whatever reason, the traditional version negates all that the humble carrot has to offer – crunch, color, healthfulness, and a hint of sweetness – by drowning it in sugary and fat-laden ingredients. Apparently some traditions are meant to be broken.
This summer we gobbled up this new generation of carrot salad with everything from lobster rolls to grilled chicken and ahi sandwiches. It always held its own. It always received praise (Who knew carrot salad could be so good!). The recipe was often requested.
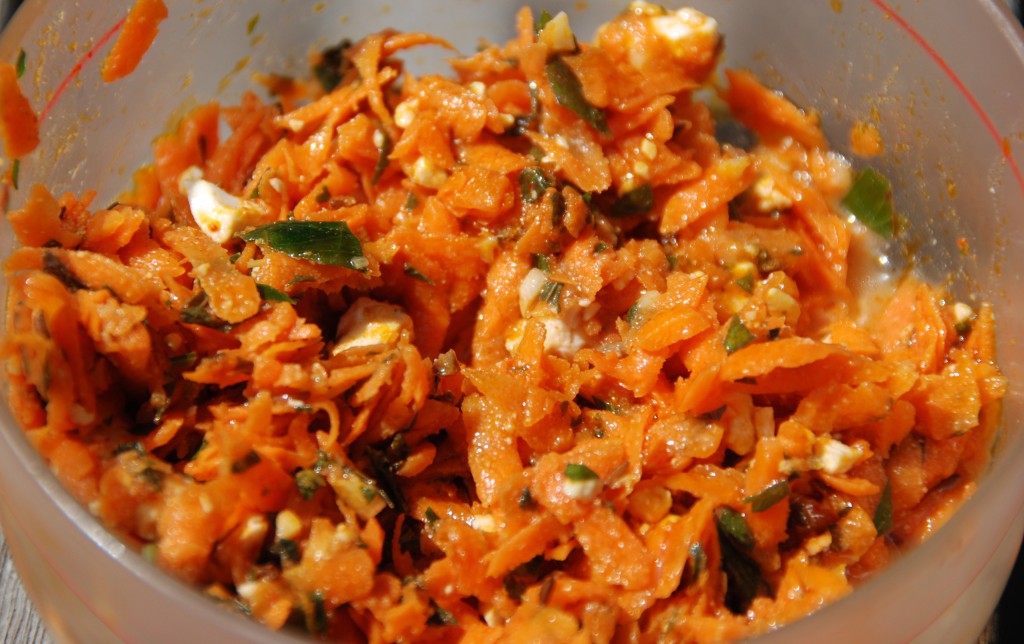
You might look at the recipe and scratch your head, wondering if all those flavors – harissa, cumin, caraway, mint, parsley, and feta – really go together. They don’t just go together, but actually conspire into something complex, surprising, and slightly addictive.
There’s the heat of the harissa and cayenne. The cool of the feta. There’s the punch of the cumin. The sweet and crunch of the carrots. There’s the freshness of the chopped herbs. The colors pop as much as the flavors – a bright melange of orange, green, and white.
This is not your mother-in-law’s carrot salad!
Carrot Salad with Harissa, Feta and Mint
Adapted from Smitten Kitchen, who adapted it from a reader
Note: I have always doubled this to serve 4-6 people. It can be made a day ahead and keeps great in the fridge for a few days.
3/4 pound carrots, peeled, trimmed and coarsely grated
4 tablespoons olive oil
1 minced clove of garlic
1/2 teaspoon caraway seeds
1 teaspoon ground cumin
1/2 teaspoon Hungarian paprika
3/4 teaspoon harissa (you should be able to find it at Whole Foods-type store)
1/2 teaspoon sugar
cayenne, to taste
3 tablespoons lemon juice
2 tablespoons flat leaf parsley, finely chopped
2 tablespoons fresh mint, finely chopped
100 grams feta, crumbled or chopped into bits
In a small sauté pan, cook the garlic, caraway, cumin, paprika, harissa and sugar in the oil until fragrant, about one to two minutes. Remove from heat and add the lemon juice and a pinch of salt. Pour over the carrots and mix. Add the herbs and mix. Add cayenne to taste. Leave to infuse for an hour (less is okay too) and add the feta before eating. Serve cold or at room temperature.
Neighborhood: Veggie Sides
September 1st, 2010 · Comments Off on Kale Chips
Today we take a break from our regularly scheduled program of all things buttered, breadcrumbed, and fried to bring you — kale. Wait! Don’t go anywhere! Keep reading eater-friends, you are about to be enlightened.
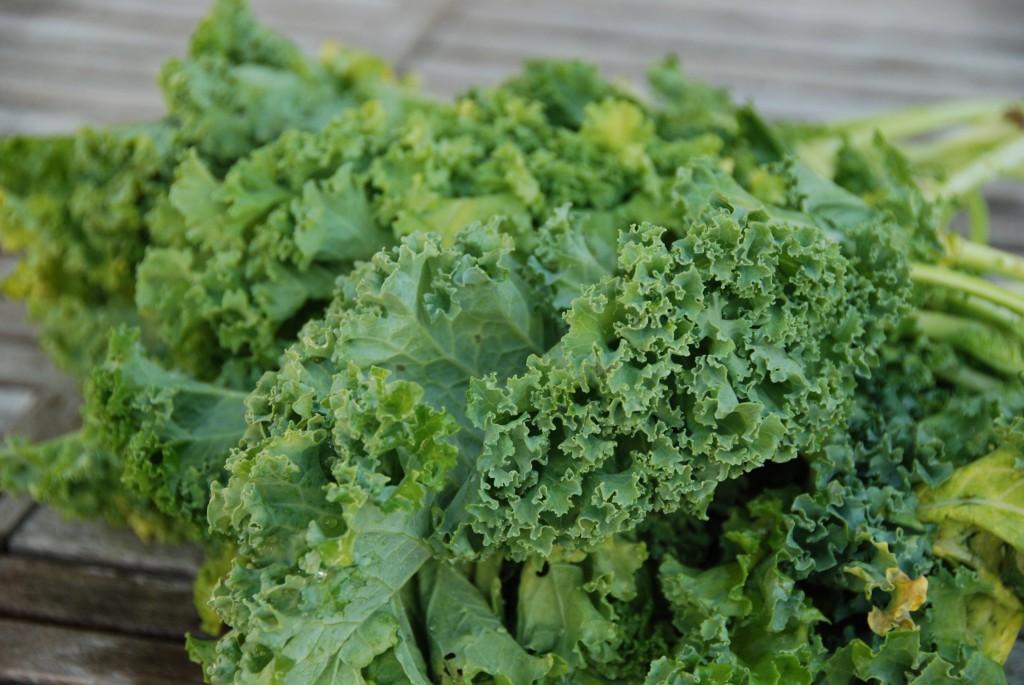
In addition to being incredibly healthy (antioxitants, beta carotene, vitamin K, vitamin C!), kale can also be incredibly tasty. And when I tell you that Kale Chips might be the easiest crowd pleaser you’ve prepared in months, what you have here is the trifecta of recipes. Healthy. Tasty. Easy. Consider this an end-of-summer gift from me to you.
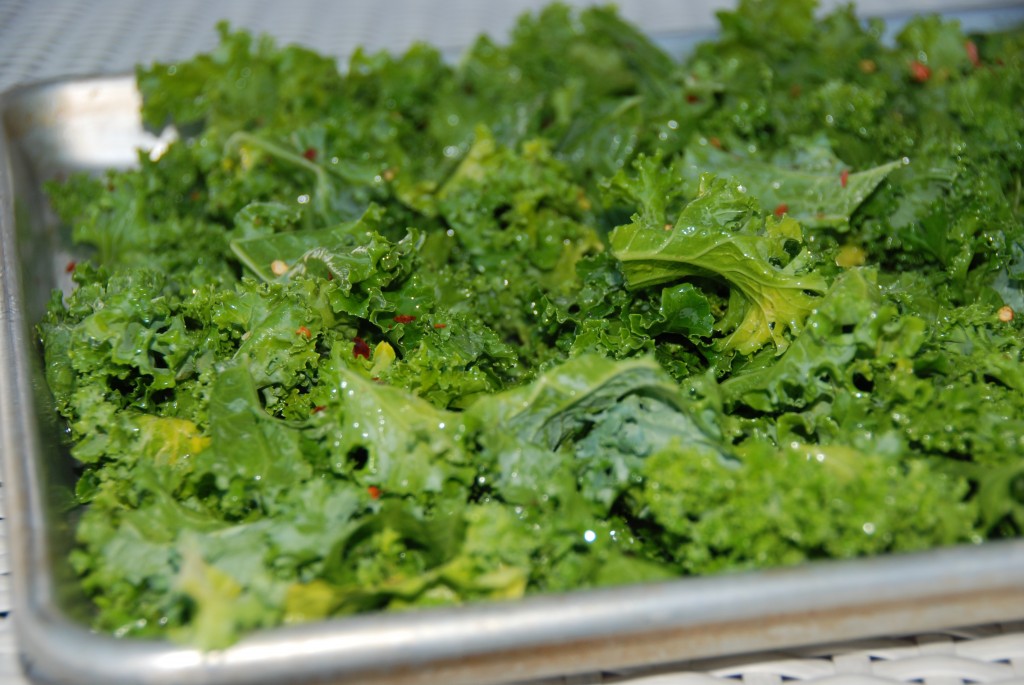
Kale can be chewy and bitter, which is why many of us pass it over for more palatable greens. I was skeptical about Kale Chips when my sister-in-law started singing their praises a few months back. Could a little olive oil and 10 minutes in the oven actually transform this tough-to-love cabbage into something light and crispy?
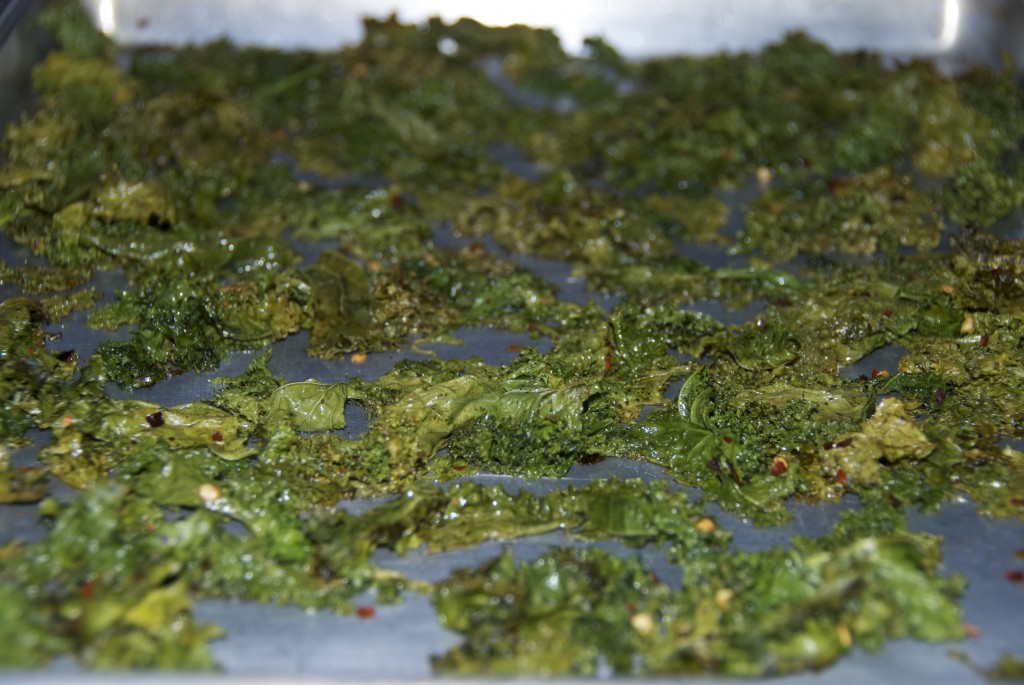
Yes! These crunchy treats make a great appetizer or snack. Their rich, green color makes them attractive too – perfect for piling on a plate or in a bowl. They’re airy, crispy and the hint of salt makes them hard to stop eating. But the best part is you don’t have to stop eating. There’s no need to ration your portion size or feel an iota of guilt. You’re eating one of the healthiest foods around and enjoying it. Consider yourself enlightened.
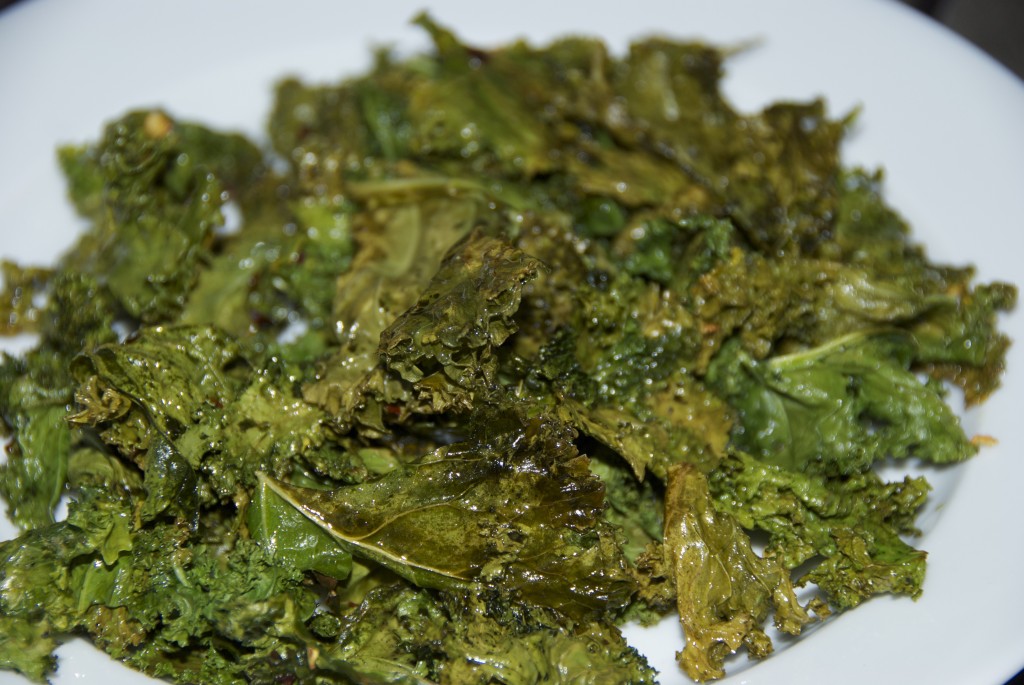
Kale Chips
1 bunch kale (I use the curly variety)
oilve oil
salt
Note: We just did a spicy batch with red pepper flakes that was divine. Get creative with your seasoning. The possibilities are endless.
Rinse and dry kale, then remove the stems and tough center ribs. Cut or tear into large pieces.
Arrange kale, tossed in just a little olive oil and salt, in a single layer (some overlapping leaves are fine) on a baking sheet and roast it at about 375 for 10-15 minutes, giving the baking sheet a shake once during the cooking time, until the edges of the kale get crispy.
Neighborhood: Veggie Sides
August 24th, 2010 · Comments Off on Cherry Brown Butter Tea Cakes
There are a handful of cooking websites I visit regularly. Sure it’s part market research, but it’s mostly for inspiration. Anyone who loves to cook and/or bake is inspired by what other people are making. It’s why we eagerly await our Food + Wine and Bon Appetit issues every month and why we share the successes and failures that come from our stove tops and ovens with our friends and family. But I digress.
When I visit these cooking websites I’m constantly amazed at how many people (both the bloggers themselves and their commentators) exclaim, “When I saw this recipe I was so excited! I already had all the ingredients!” Who are these people? Are they liars? Farmers? Because even though I keep a decently stocked pantry and refrigerator, rare is the case that I don’t have to run to the store for something.
Sometimes it’s a spice I used up and didn’t replace. Sometimes it’s a new box of brown sugar because the one I keep tucked on the shelf for rainy days has hardened beyond repair. Sometimes it’s an herb. A vegetable. A fruit. Something. Until today.
My in-laws left us with a pound of cherries that we’d never be able to consume before they turned. I decided to bake them. But into what? I didn’t want to make a pie or a crumble where I’d still be faced with leftovers (admittedly, I also was in no mood to tackle crust). My mind turned to bite-sized possibilities.
A few weeks ago, in a moment of culinary brilliance, I prepared my favorite banana bread recipe in a 12-cup muffin tin. They were the perfect grab-and-go breakfast or snack and the friends we offered them to found them too cute to resist. Bite-sized is, after all, so much better. “Cut it up and they will eat it” my savvy Mom used to say to my brother and I while slicing a previously ignored apple or cantaloupe. Within minutes, the very same apple we had shunned, the very same cantaloupe we had said we didn’t want, was gone. I play the same game with my husband and in turn we play it with friends. No one wants that last piece of steak? Cut it into fours and poof! Again, I digress. It must be the weather.
When I stumbled across a tart-already-adapted-to-a-bar recipe on Smitten Kitchen I wasn’t only excited because I had every single ingredient (man, that really does fee great to say), but also because I knew it would be a contender for the muffin tin.
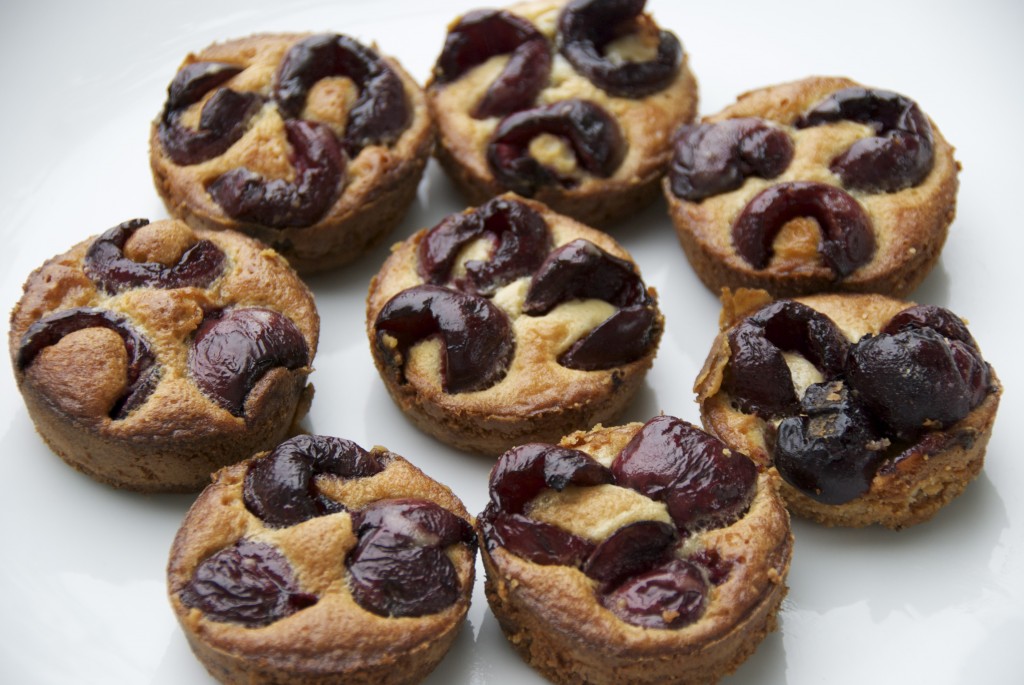
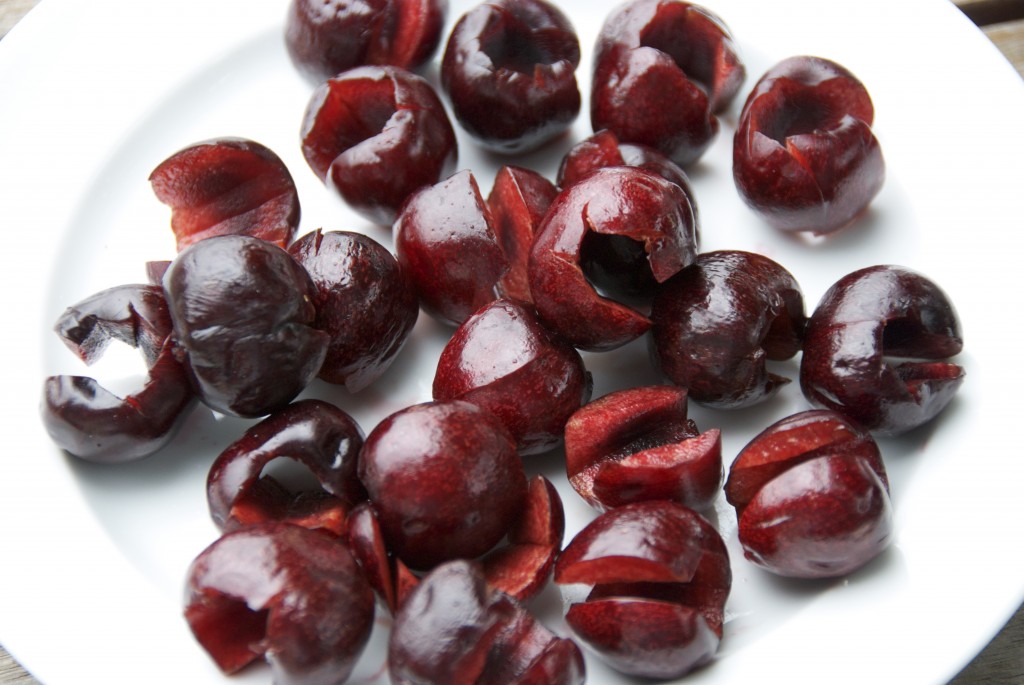
I did not have a cherry pitter, but the task of manually pitting the cherries was much easier than I thought it would be (and not messy at all, which is more than I can say for my last foray with a pitter). I used a small paring knife to cut around the pit and the cherries emerged relatively unscathed.
For those of you who have not browned butter before, do not be intimidated! Do some reading before you get started and be patient. It’s much better to brown your butter on lower heat even if it takes longer. Keep stirring and give it your undivided attention, because the second you turn away Murphy’s Law guarantees it will burn. If you fail the first time, just give it another go. It’s only butter.
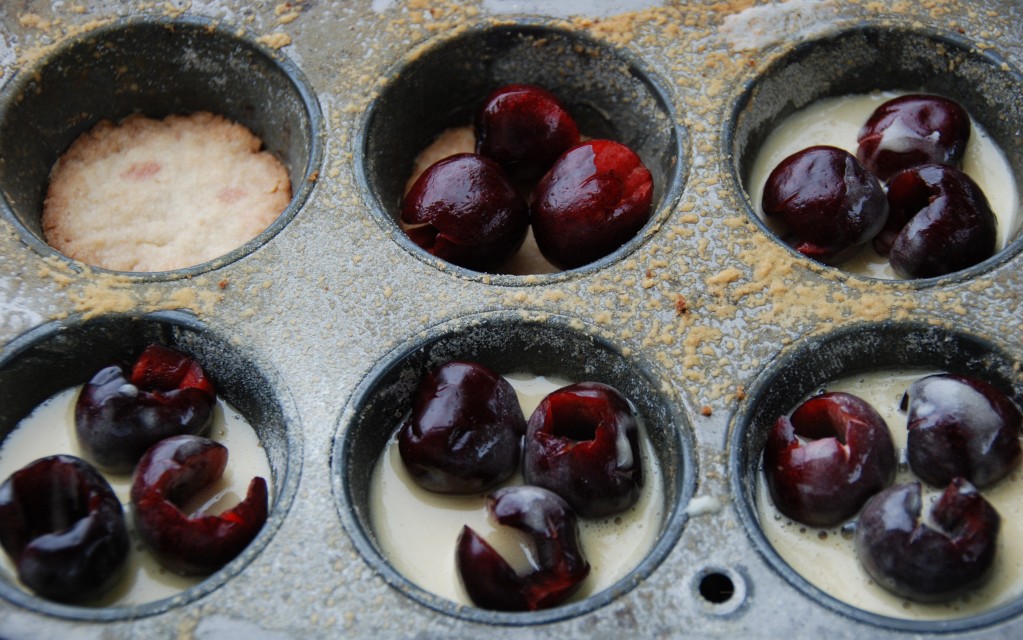
I did my best to pour the batter around the cherries, but when they came out of the oven it was clear that such fastidiousness wasn’t required. Next time I’d probably pour the batter in first and then place the cherries.
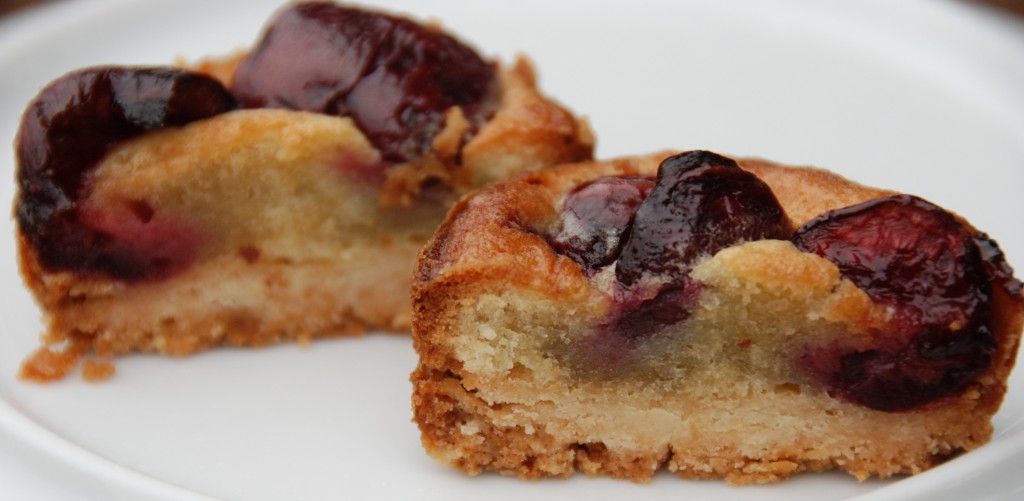
The muffin tin gives each tea cake a crust on the bottom and around the edges for the ideal crunch-to-cake-to-fruit ratio. The cherries were the star, but the brown butter held its own as a worthy suitor. These pretty little packages weren’t too sweet, and would be ideal for breakfast, brunch or a BBQ. A snack-sized scoop of vanilla ice cream or a dusting of powdered sugar would put them over the top. Yes, the individualized size takes a little more prep time, but the pay off is totally worth it, both in appearance and texture.
Cherry Brown Butter Snacks
Adapted from Smitten Kitchen who adapted from Bon Appetit
I halved this recipe to produce eight snacks. If you’re set on making bars, use an 8×8 baking pan. You can certainly sub in another fruit – whatever you have on hand!
Crust:
7 tablespoons unsalted butter, melted
1/3 cup sugar
1/4 teaspoon vanilla extract
1 cup plus 1 tablespoon all purpose flour
Pinch of salt
Filling:
1/2 cup sugar
2 large eggs
Pinch of salt
1/4 cup all purpose flour
1 teaspoon vanilla extract
1/2 cup (1 stick) unsalted butter
1 pound sweet cherries should yield 12 ounces of pitted cherries, I used 3 cherries per individual muffin mold, you can use 12 ounces of whatever fruit you like
Crust: Mix melted butter, sugar, and vanilla in medium bowl. Add flour and salt and stir until incorporated. Transfer dough to prepared tin, and use your fingertips to press the dough evenly across the bottom of the molds (about 1 TBSP of dough per mold). While the recipe I adapted from said to use parchment paper, I just greased and floured my muffin tin with great results. Bake until golden, about 15 minutes (they will puff slightly while baking). Transfer crust to rack and cool in pan. Maintain oven temperature.
Filling: Cook butter in heavy small saucepan (a lighter-colored one will make it easier to see the color changing) over medium heat until nutty brown, stirring often and watching carefully, about six minutes. Immediately pour browned butter into glass measuring cup to cool slightly.
Whisk sugar, eggs, and salt in medium bowl to blend. Add flour and vanilla and whisk until smooth. Gradually whisk browned butter into sugar-egg mixture; whisk until well blended.
Arrange pitted cherries on cooled crusts. Carefully pour browned butter mixture evenly over the fruit.Bake bars until filling is puffed and golden and tester inserted into center comes out clean, about 25 minutes. Remove tea cakes from muffin tin and cool on a rack.
Note: These can be made at least a day ahead, and stored at room temperature. Any longer, keep them in the fridge.
Neighborhood: Sweets
August 17th, 2010 · Comments Off on Pan-Fried Catfish
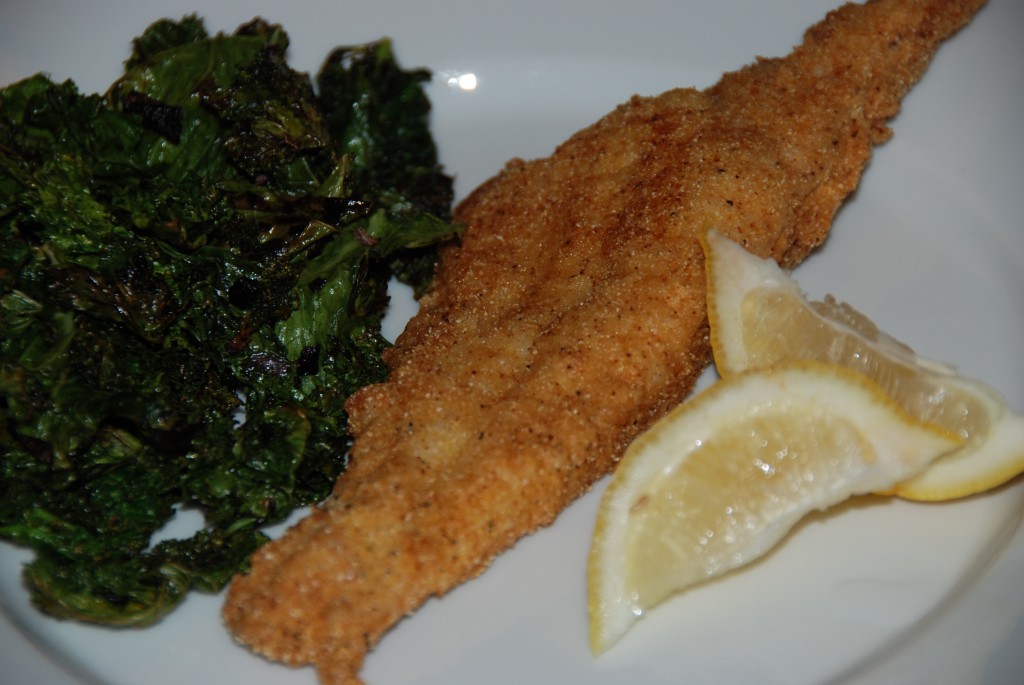
Ca-ca-ca-ca-catfish!
I know, I know. I already hear you screaming: “Bottom feeder!” “Mercury laden!” For a whiskered creature, catfish has a bad rap.
These days, most of the catfish you’ll find at the supermarket and fish store is farmed. The beauty of farmed fish is that it doesn’t have the high mercury counts of its wild brethren. If you’re an educated shopper and you’re willing to ignore catfish’s ill-gotten reputation, you can eat this great fish without angst.
A few days ago we were reminiscing about our time in Seattle (we lived there for about four years). Naturally, our conversation turned towards one of our favorite meals in the whole city: the catfish sandwich at Matt’s in the Market. If you ever find yourself in the Emerald City, it should be at the top of your list. Needless to say, our trip down memory lane ended at the fish monger!
Catfish is an ideal frying fish. It’s dense and holds together, but it’s also moist and flavorful. It doesn’t take a lot to prep and I’d be remiss not to mention that it’s also incredibly cheap. All in all, catfish can make a quick, delicious, and satisfying meal.
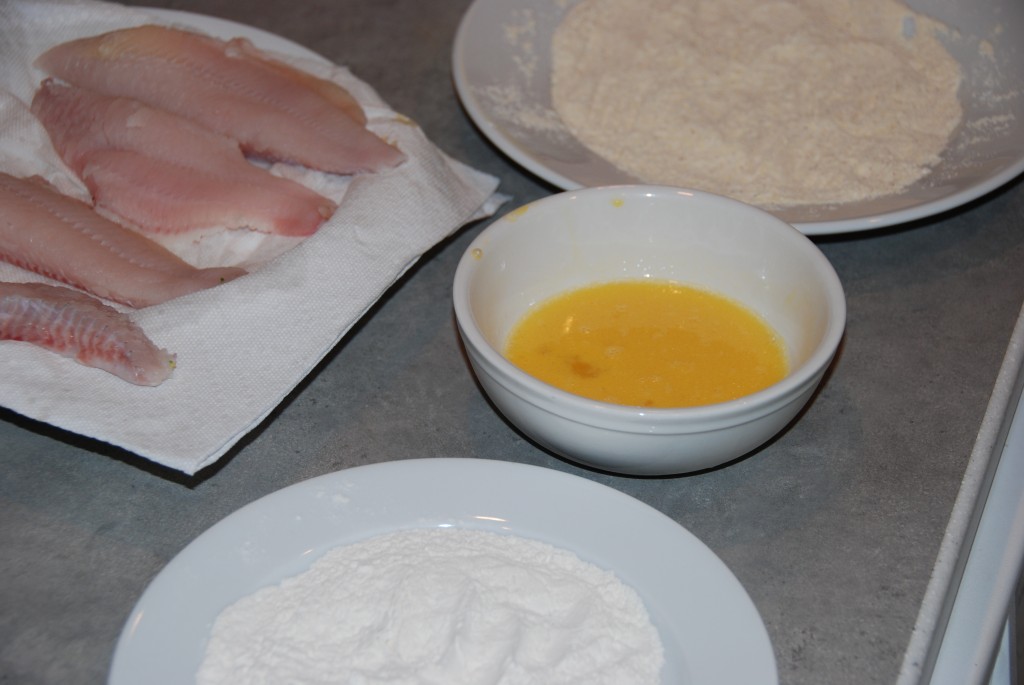
It’s important to cut your catfish fillets in half lengthwise. Pat them dry and season before you send them through your dredging and egg wash stations. We’re no strangers to frying fish and over the years we’ve eliminated the flour dredging step from our preparation. Having never fried catfish before, we weren’t willing to break from instruction on the first go round, but next time, I would give it a try for at least one fillet to see if there was a difference.
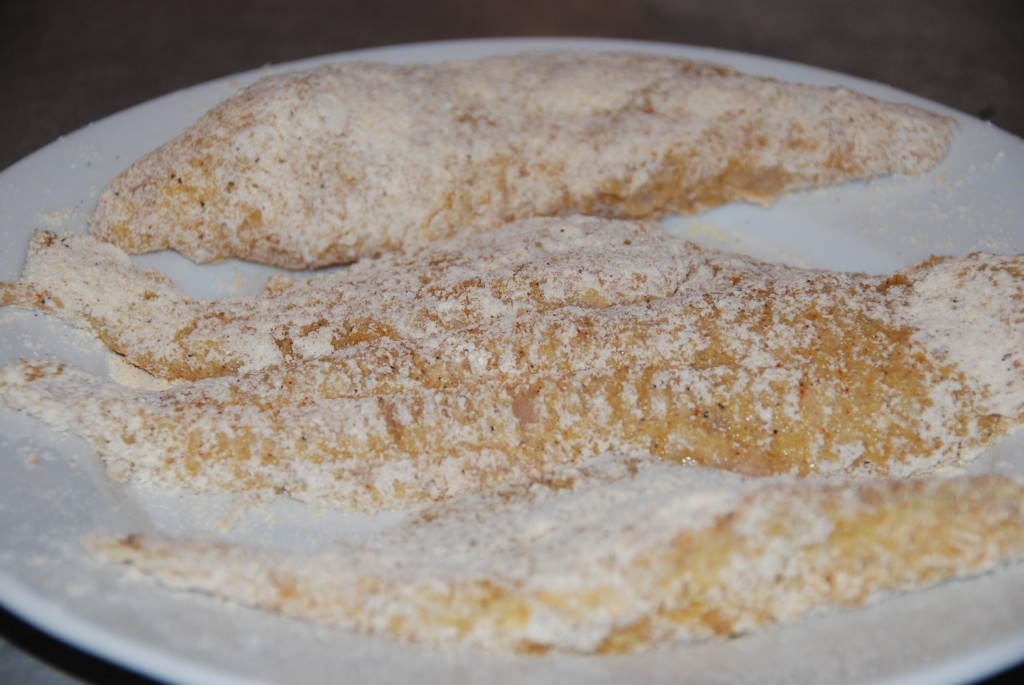
Be sure to taste your cornmeal mixture and adjust the seasoning to your taste. We wanted ours to have a little more kick and added more cayenne.

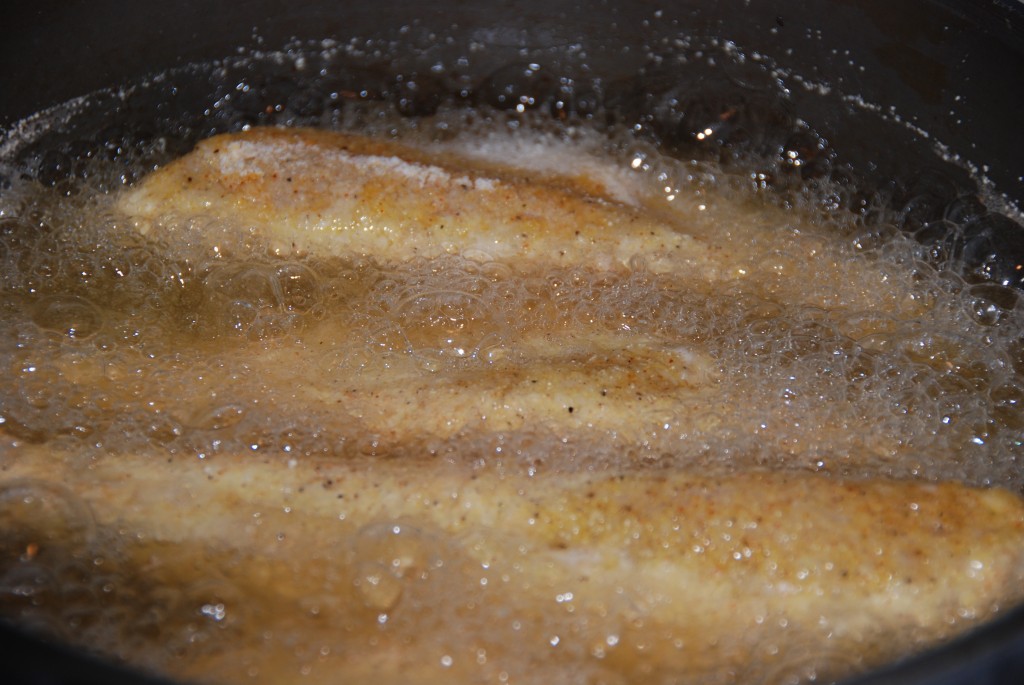
I know pan-frying can be intimidating, but you’ll be in good shape if you’re patient while your oil heats to the right temperature (see recipe below). Have your kitchen timer or stop watch at the ready – the catfish was perfectly cooked at the four minute mark. Some people like to eat catfish with a dipping sauce, but the purists in us opted only for lemon wedges (and a side of sauteed kale and shallots).
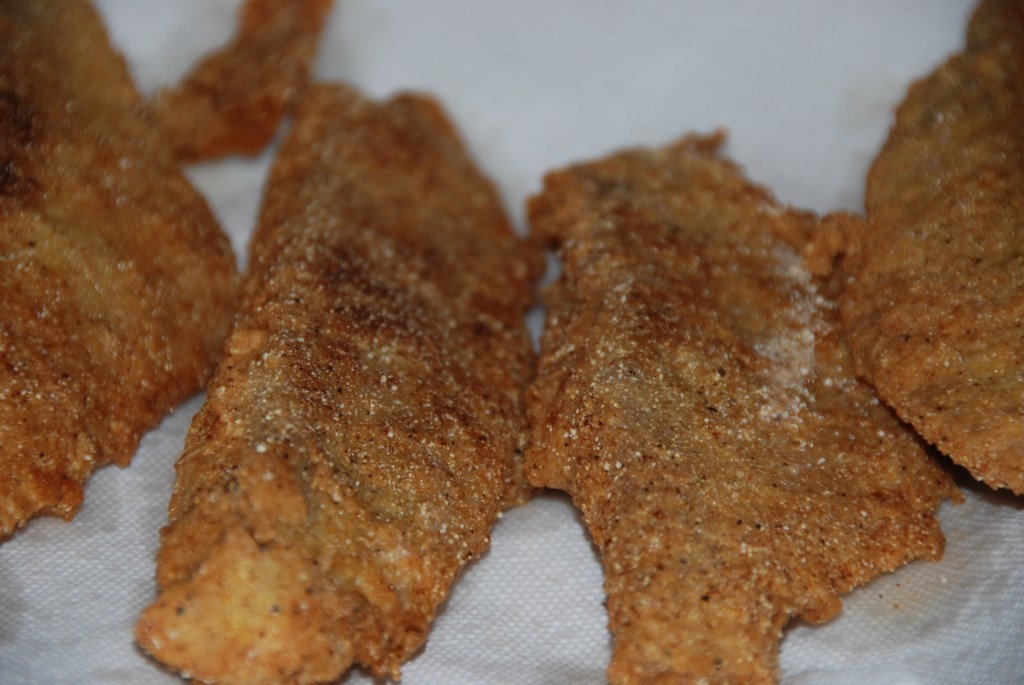
After a few bites we looked at each other, nodded in silent agreement, and gave each other the requisite high-five for our Seattle-inspired and delicious meal. Think of us when you make it!
Pan-Fried Catfish
From the New Best Recipe Cookbook
2 catfish fillets, skin and dark fatty flesh just below the skin removed, fillets cut in half lengthwise (mine were about 7 ounces each)
1 cup unbleached all-purpose flour
1/2 cup cornmeal (I used yellow)
Salt and ground pepper
1/8 tsp cayenne (or more to taste)
2 large eggs
2 1/2 cups vegetable oil
Lemon wedges
Place 1/2 cup flour in shallow dish. In another dish, mix together the remaining 1/2 cup flour, cornmeal, 1/4 tsp black pepper, and cayenne. In a third dish, whisk the eggs with 1 TBSP of the oil.
Pat the fish fillets dry and season with salt and pepper. Dredge the fish in the flour, then dip into the egg, and then coat with cornmeal mixture. Shake off excess after each step. Heat 1/2 inch of oil in a large, heavy-bottomed Dutch oven or high-sided saute pan until oil is 400 degrees. (The oil should not smoke.)
Place catfish fillets in the oil and fry for a total of four minutes, turning once. Keep oil between 385-390 degrees during frying process. Remove fillets from oil and lay them on a plate lined with paper towels. Blot to remove any excess oil. Serve with lemon wedges.
Neighborhood: Fish & Seafood
August 10th, 2010 · Comments Off on Summer Succotash
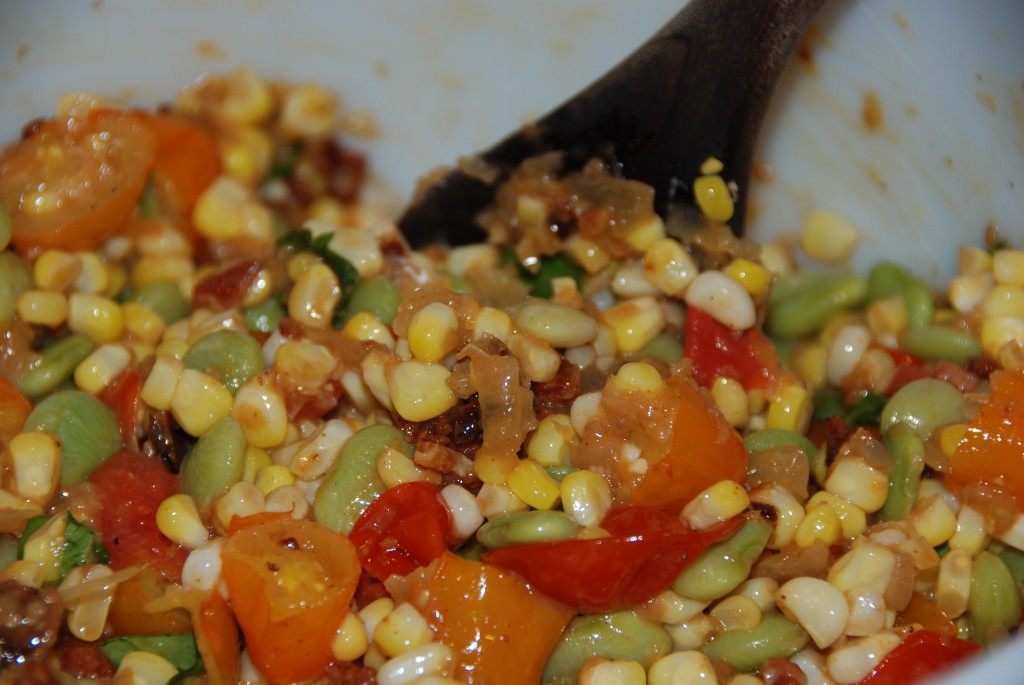
Tomatoes! Corn! Farm stands and markets are overflowing with these irresistible and versatile summer vegetables. They can be used in so many different and wonderful ways it’s hard to grow tired of them. And need I remind you it’s already August – soon you’ll be wearing a sweater, pining for all things summer, and wondering where all the corn and tomatoes went.
This succotash has a lot going for it. First, it utilizes both corn and tomatoes (hoorah – you don’t have to choose!). Second, there’s no cream or butter, so rather than tainting the rest of your plate’s occupants with its soupiness, this succotash is crunchy with freshness. Oh, and it also has bacon. Yep, bacon.
The bacon is what drew me to the recipe initially and it played an even bigger role than I was expecting. Each bite was sweet, salty, crunchy, and bursting with the summery flavors of corn and tomatoes. We ate it with steak, but it would be perfect with grilled scallops, shrimp, or crab cakes. It will dress up any casual summer meal.
You can use fresh or frozen beans. I shelled fresh beans last summer and swore I’d never do it again. But if you’re feeling up to the task (are you crazy? it’s gorgeous outside), you’ll need about a pound of fresh pods.
I used my patented mix of yellow grape and red cherry tomatoes. They have slightly different tastes and the vibrant color combination enhances any dish.
The fine folks at Gourmet also suggest serving this succotash with garlic croutons. I didn’t do this, but how could it be bad?
Summer Succotash
Adapted from Gourmet
1 cup frozen baby lima beans
1/4 pound bacon (about 4 slices)
1 1/2 tablespoons olive oil
1 small Vidalia onion or other sweet onion, chopped
1 large garlic clove, minced
3/4 pound cherry tomatoes (about 1 1/2 pints), halved (I used a mix of red and yellow)
Fresh kernels from 4 ears corn
1 tablespoon sherry vinegar, plus more to taste (I only had red wine vinegar)
1/4 cup packed fresh basil leaves
1/2 cup packed arugula leaves
In a small saucepan of boiling salted water cook beans over moderate heat, stirring occasionally, until just tender, about 3-5 minutes. In a sieve drain beans and rinse under cold running water to stop cooking. Set aside.
In a skillet cook bacon over moderate heat until crisp. Drain bacon on paper towels and crumble. Pour off all but 1 tablespoon bacon fat from skillet. Add oil to bacon fat in skillet and cook onion over moderate heat, stirring, until softened. Add garlic and cook for 1 minute more. Add tomatoes, corn, and vinegar and cook, stirring, until tomatoes begin to lose their shape. Remove skillet from heat and gently stir in cooked beans and bacon. Cool succotash to room temperature and gently stir in basil and arugula, and salt, pepper and additional vinegar to taste.
Neighborhood: Veggie Sides
August 2nd, 2010 · 1 Comment
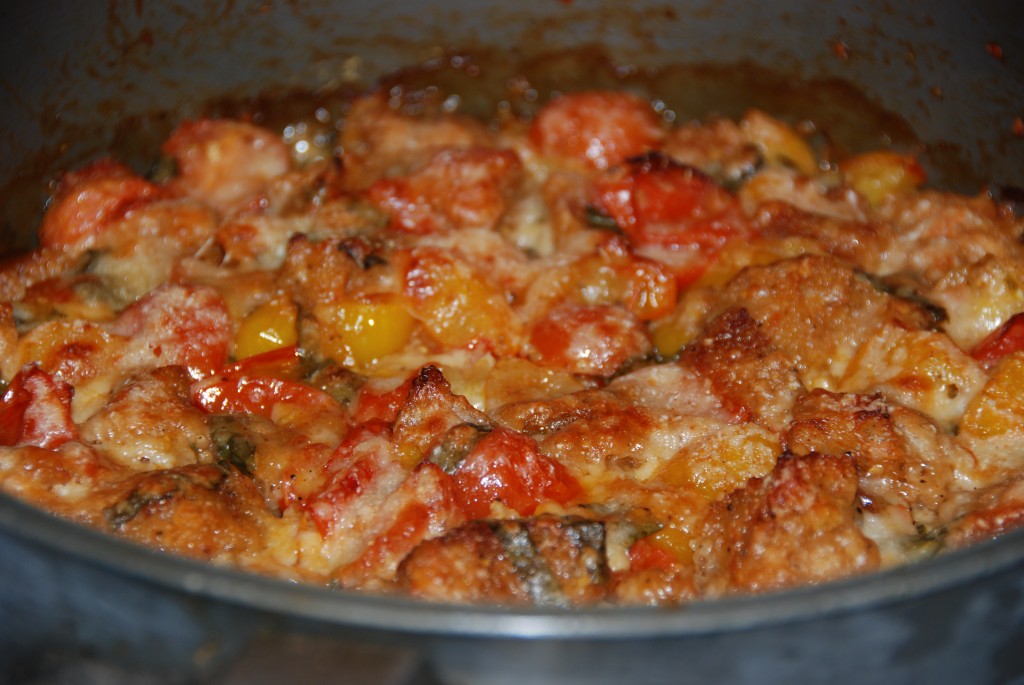
This weekend, fresh seafood and grilled meat took a back seat to this insanely amazing tomato dish. I can’t remember the last time I received such high accolades. It was as though I had performed a magic trick. Eyes were wide with wonder. There were proclamations of “best side dish ever,” and “can you make this again tomorrow?” My husband looked at me like I was the only woman (and chef?) in the world.
For those of you living under a rock, it’s tomato season! Farmer’s Markets are filled with sweet and juicy yellow, red, and green tomatoes in every size and shape. Pints of grape tomatoes and cartons of cherry tomatoes beckon me. I keep them washed and at-the-ready. I pop them like candy. I look for recipes that will exploit their wonders.
For this recipe I used a combo of yellow grape and red cherry tomatoes. The color mix is bright and summery. Feel free to use whatever tomatoes look and taste the best. I’m pretty sure you can’t go wrong.
Though the bread starts toasted, during baking the starchy cubes soak up the tomato juices and are converted to gnocchi-like consistency – pillowy and delicate. The tomatoes and basil conspire int0 a sort of hearty sauce. The layer of Parmesan bubbles and browns.
What are you waiting for?
Scalloped Tomatoes
3 tablespoons olive oil
2.5 cups bread from a French boule (I used sourdough boule), crusts removed, cut into 1/2-inch cubes
2 lbs pounds yellow and red cherry tomatoes, cut into halves
3 cloves garlic, minced (about 1 tablespoon)
2 tablespoons sugar (I skip this when the tomatoes are sweet enough without any help.)
2 teaspoons Kosher salt
1 teaspoon freshly ground black pepper
1/2 cup thinly slivered basil leaves, lightly packed
1 cup freshly grated Parmesan cheese
Preheat the oven to 350°F. Heat olive oil in a large ovenproof sauté pan (le creuset would probably work great) over medium-high. Add the bread cubes and stir so that they are evenly coated with oil. Cook cubes, tossing frequently, until toasty on all sides, about 5 minutes.
Meanwhile, combine tomatoes, garlic, sugar, salt and pepper in a large bowl. When the bread cubes are toasted, add the tomato mixture and cook them together, stirring frequently, for 5 minutes. Remove from heat, and stir in the basil. Top with Parmesan cheese. Bake 35 to 40 minutes until the top is browned and the tomatoes are bubbly.
Neighborhood: Veggie Sides
July 27th, 2010 · Comments Off on Baked Clams
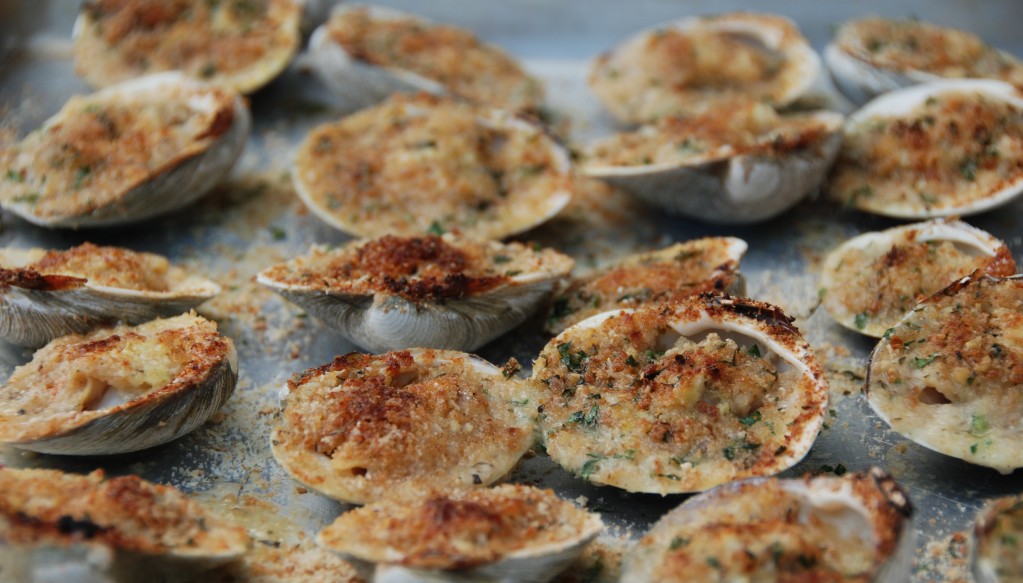
I can’t believe that it’s almost August and I’m only now writing a post on baked clams! Baked clams are one of our summer staples, usually consumed with pre-dinner drinks or as an accompaniment to whatever is really for lunch (yes, I live in a world where baked clams are a side dish). One of the reasons these make such a frequent appearance is because the same husband who loves to grill, also loves to clam. Amazing, “toeing” and “raking” for clams is also an activity our summer guests seem to love. Yes, that’s right, we send our guests into Shinnecock Bay, armed with rakes and mesh bags, to dig for clams. For all you consummate hosts out there, it’s as gratifying as it sounds: “Now get out there and find us something to eat!” The good news is that even if you don’t have a forager amongst your family or friends, clams are readily available at supermarkets and fishmongers.
While my clammers are wading, I’m in charge of the mise en place. Combine a stick of room temperature butter with 4 cloves of finely chopped garlic. This is more than enough for two dozen clams. Any extra can just be wrapped in plastic wrap and tucked in the fridge for next time or for another meal’s garlic bread.
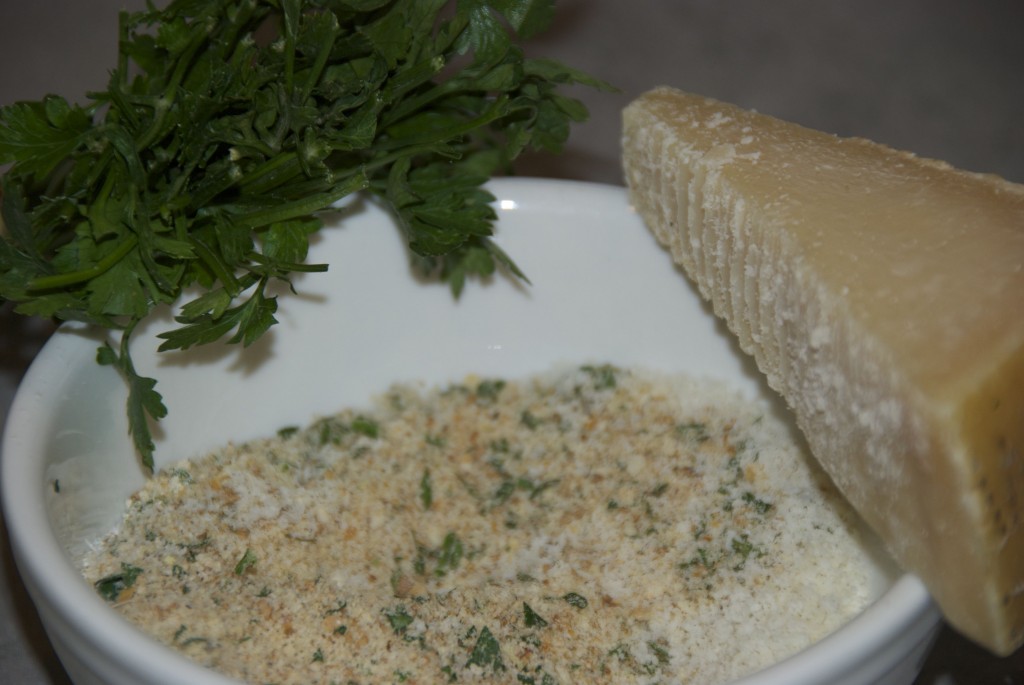
In a bowl, mix freshly chopped parsley, freshly grated parmesan cheese and bread crumbs. (In a Martha-esque moment I recently used homemade breadcrumbs and the clams turned out under seasoned.)
Even if you buy your clams, you can still partake in the opening festivities, though I’ll warn you that it can be tough – and frustrating – work. Like so many other things in life, it gets easier with practice. A few weeks ago the NY Times Diner’s Journal had a good article on some of the tricks to opening clams. While you’re honing your skills, I might recommend purchasing your clams on the half shell.
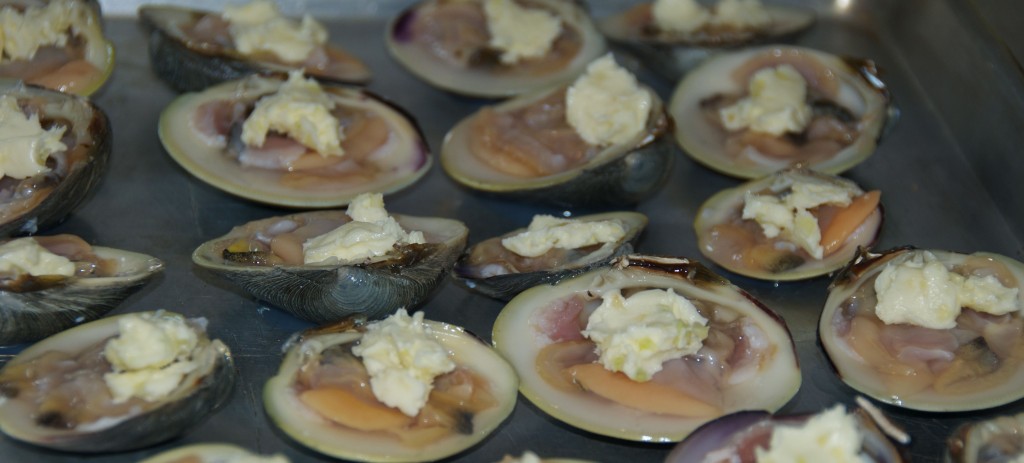
Place your clams on a baking sheet and give each one a dime-sized dollop of garlic butter and then a healthy sprinkling of the breadcrumb mixture.
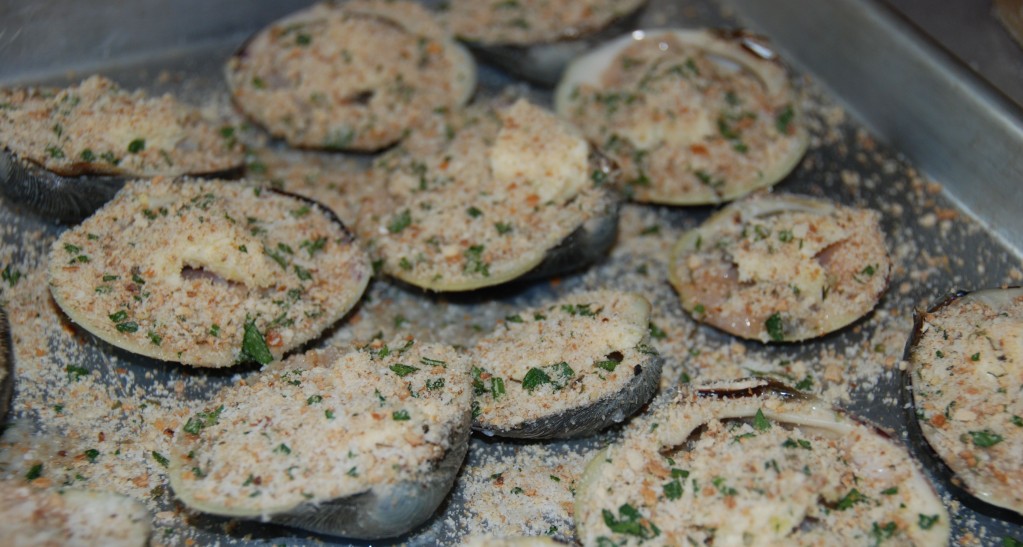
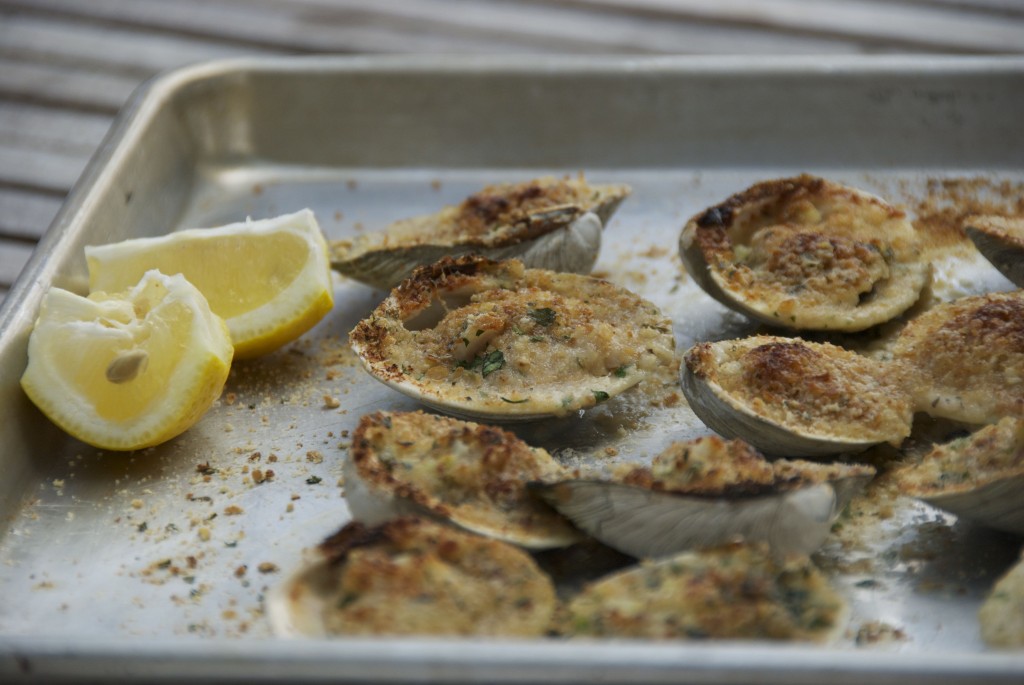
Bake in the top third of your oven at 350 for 8-10 minutes. Then broil until golden brown – keep a close eye as they’ll darken quickly. Squeeze some fresh lemon over the baked clams and eat. You’ll be as happy as a . . . . (apologies, but how could I resist?).
Neighborhood: Fish & Seafood


